

The Cyclepedia 1986-2007 Kawasaki Ninja EX250 online motorcycle service manual features detailed, full-color photographs and wiring diagrams, complete specifications with step-by-step procedures performed and written by a veteran Kawasaki dealer trained motorcycle technician.
1986-2007 Kawasaki Ninja EX250 Online Motorcycle Service Manual Motorcycle Coverage
1986 Kawasaki EX250-E1 Ninja
1987 Kawasaki EX250-F1 Ninja
1987 Kawasaki EX250-E2 Ninja
1988 Kawasaki EX250-F2 Ninja
1989 Kawasaki EX250-F3 Ninja
1990 Kawasaki EX250-F4 Ninja
1991 Kawasaki EX250-F5 Ninja
1992 Kawasaki EX250-F6 Ninja
1993 Kawasaki EX250-F7 Ninja
1994 Kawasaki EX250-F8 Ninja
1995 Kawasaki EX250-F9 Ninja
1996 Kawasaki EX250-F10 Ninja
1997 Kawasaki EX250-F11 Ninja
1998 Kawasaki EX250-F12 Ninja
1999 Kawasaki EX250-F13 Ninja
2000 Kawasaki EX250-F14 Ninja
2001 Kawasaki EX250-F15 Ninja
2002 Kawasaki EX250-F16 Ninja
2003 Kawasaki EX250-F17 Ninja
2004 Kawasaki EX250-F18 Ninja
2005 Kawasaki EX250-F19 Ninja
2006 Kawasaki EX250F6F Ninja
2007 Kawasaki EX250F7F Ninja
1986-2007 Kawasaki Ninja EX250 Online Motorcycle Service Manual Table of Contents
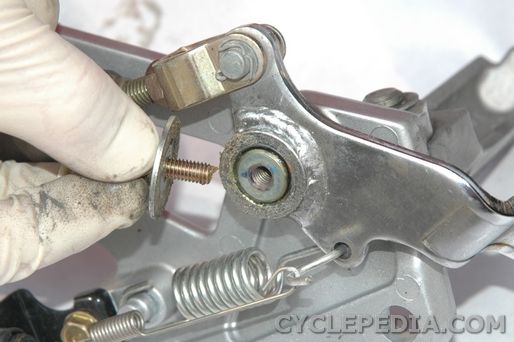
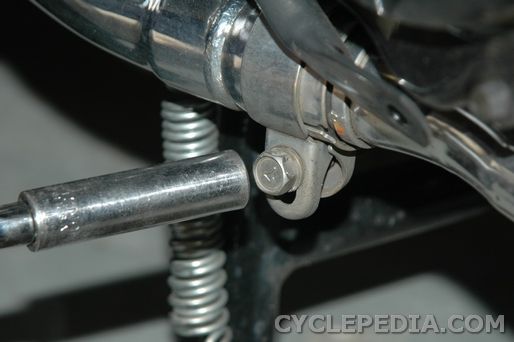
External Components – Seat, Side Covers, Fuel Tank Removal, Fairing Removal, Brake Pedal, Shift Lever, Footpegs, Front Fender Removal, Rear Fender, Tail Section
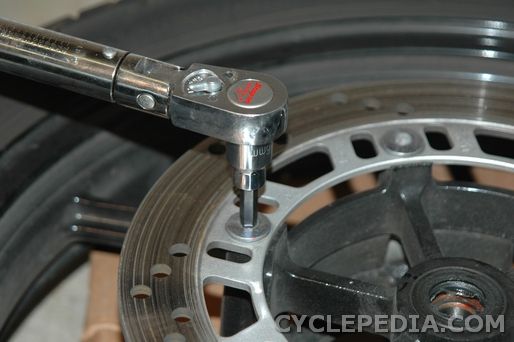
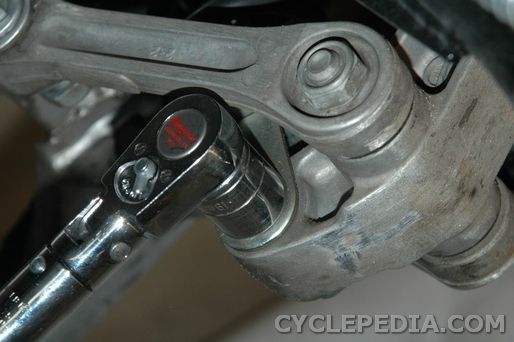
Periodic Maintenance – Periodic Maintenance Chart, Drive Chain Adjustment, Brake Pad Replacement, Headlight Aim, Brake Bleeding
Cooling System – Coolant, Cooling Fan Switch Inspection, Water Temperature Sensor, Thermostat, Radiator
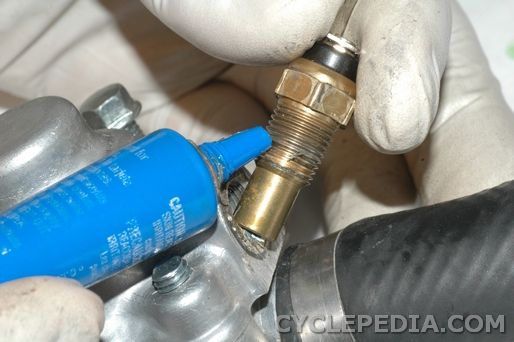
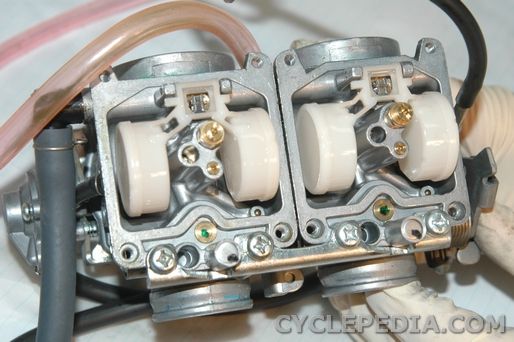
Fuel System – Air Filter Inspection, Cleaning and Replacement, Engine Idle Speed Adjustment, Carburetor Synchronization, Carburetor Fuel Level Inspection, Carburetor Float Height Adjustment, Carburetor Removal and Reinstallation, Carburetor Disassembly, Evaporative Emissions Control System (California Models Only), Fuel Valve Petcock, Fuel System Inspection and Adjustment
Exhaust System – Exhaust System Installation, Exhaust System Removal
Clutch – Clutch Cable, Clutch

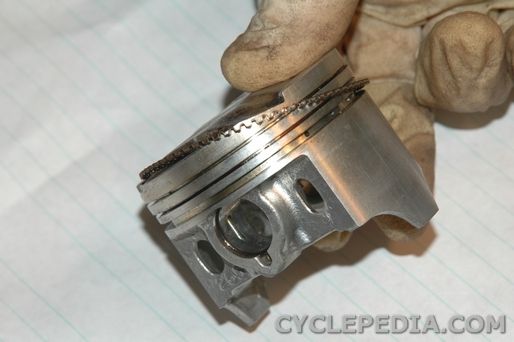
Engine Top End – Compression Test, Valve Clearance Inspection and Adjustment, Cam Chain Tensioner Removal, Camshaft Removal and Reinstallation, Cylinder Head Cover, Cylinder Head, Pistons, Rings and Cylinders
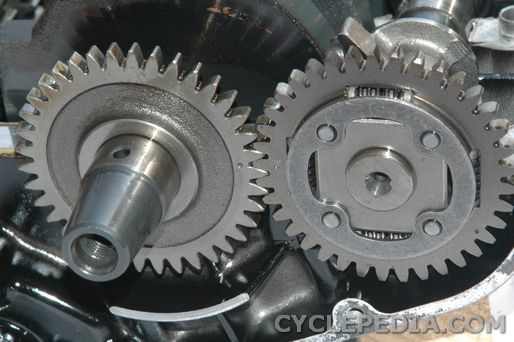
Engine Bottom End – Engine Oil, Crankshaft Flywheel Rotor, Oil Pump, Crankcase Splitting, Crankshaft and Connecting Rods, Transmission, Balancer Shaft
Engine Removal and Installation – Engine Installation, Engine Removal

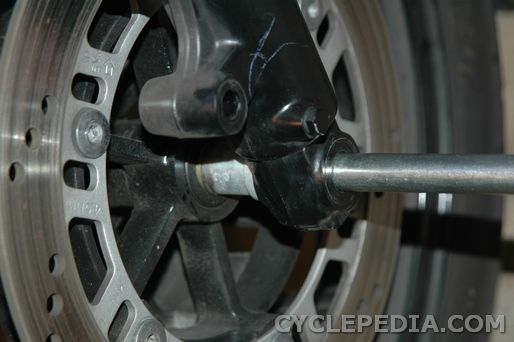
Front Wheel – Front Tire, Front Wheel Bearings, Front Wheel Installation, Front Wheel Removal
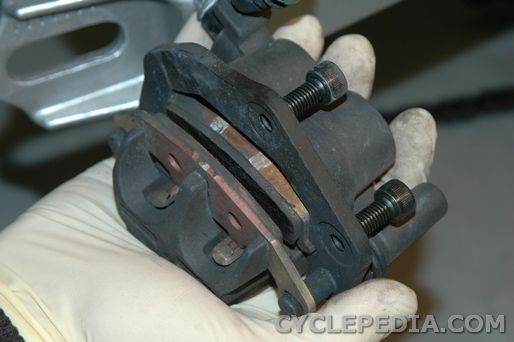
Front Brakes – Brake Caliper, Brake Disc, Brake Master Cylinder, Brake Pad Replacement

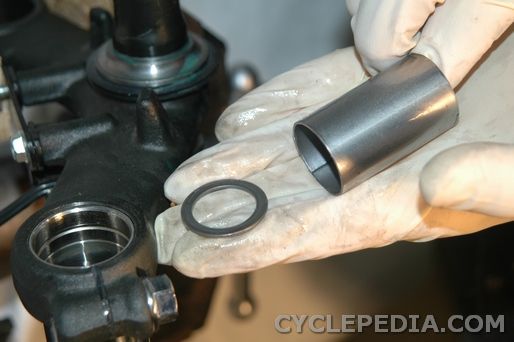
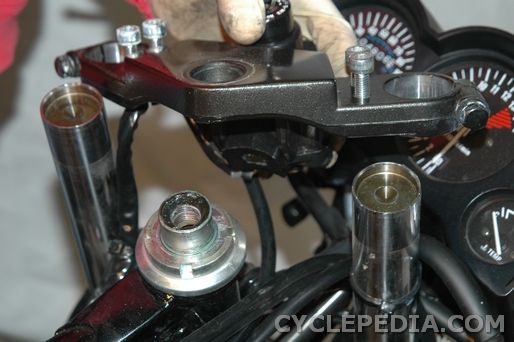
Front Suspension – Fork Oil, Fork Seal Replacement, Front Fork Disassembly, Front Fork Inspection, Front Fork Installation, Front Fork Reassembly, Front Fork Removal
Steering – Steering Stem Bearing Replacement, Adjustment of Steering Stem Bearings
Rear Wheel – Rear Tire, Rear Wheel Bearings, Rear Wheel Installation, Rear Wheel Removal

Rear Brakes – Brake Caliper, Brake Disc, Brake Master Cylinder, Rear Brake, Rear Brake Adjustment
Rear Suspension – Swingarm Removal, Swing Arm Bearings, Shock Absorber Removal, Tie Rods and Rocker Arm, Shock Absorber Installation, Swingarm Installation
Final Drive – Drive Chain Replacement, Engine Sprocket, Rear Sprocket
Electrical System – Battery, Battery Removal and Installation, Charging System, Charging System Component Replacement, Ignition System, Spark Plugs, Cooling Fan System, Fuses, Light Bulbs, Starter Motor Removal, Switch Replacement, Switch Testing, Wiring Diagrams

1986-2007 Kawasaki Ninja EX250 Online Parts Diagrams
1986-2007 Kawasaki Ninja EX250 Troubleshooting
Professional Tech Support
My Service Records – Online Service Log With Reminders New!
Access the Cyclepedia 1986-2007 Kawasaki Ninja EX250
Online Motorcycle Manual Now – CLICK HERE!


gription says
I purchased a one year subscription for the Cyclepedia.com Kawasaki Ninja 250 manual. Love your manuals! I want to upgrade to the lifetime subscription. – Mike L.
gription says
I have an aftermarket Ninja 250 manual, and also the official Kawasaki manuals. In truth, those manuals have have pretty lousy pictures, and not very detailed schematics, and have proven all but useless for a number of little things I need to figure out. I purchased the Cyclepedia Press LLC online Kawasaki Ninja 250 manual and it already answered a few questions I couldn’t get answered in the other manuals. Your photos and illustrations are absolutely sensational. Not only in their clarity, but also you seem to have chosen just the right things to photograph and illustrate. For a decent mechanic and machinist who’s pretty much motorcycle-illiterate, you really have made my day. Thanks. – K. Peal
admin says
Thanks for creating the Cyclepedia Kawasaki Ninja 250 online manual. I purchased a couple of beat up, wrecked Ninja 250’s – one had a bent frame, and a running engine, the other had a straight frame, and a cracked engine. I’ve never touched anything mechanical in my life and with your manual and only two weeks time I now have a running bike! Thanks for your help. – Jonathon S.
gription says
The Cyclepedia.com Kawasaki Ninja EX250 manual is great! I’ve never worked on a motorcycle before, but with your workshop manual I was able to remove and rebuild the engine, and transmission, and fully rebuild the carburetor myself. Again, let me say the Cyclepedia manual is great and because of the detailed information I was confident enough to break it down, put it back together and get it to work correctly afterwards. WOW !! you just don’t know how much of a accomplishment that was for me. – B. Beason
admin says
I have recently replaced the engine in my Kawasaki ZZR250 and found your online manual to be very helpful. Thank you. – Micheal P.
admin says
I am a subscriber to the Cyclepedia 2007 Ninja 250 online repair manual – thank you for this wonderful resource, keep up the good work. – David J.
gription says
Thank you for the online Kawasaki EX250 manual. I followed the instructions and the new starter is installed and working perfectly. I am very satisfied with this service and I saved BIG money buying a used part and doing the repair myself. Cyclepedia is a great service. The pictures and directions are simple and accurate. – A. Iagasi
gription says
Love your Ninja 250 online manual service. As a professional auto tech, I’ve seen good and bad manuals. Yours is very good, has excellent pictures, and handy torque specs and hints. The hyperlinked topics relevant to a repair are great. I haven’t noticed any holes in the info covered…better than a lot of manuals I’ve seen. Being on line is very handy too. No worries about dragging a paper book from home to work or to a friends. The price was half of a paper factory manual, a great value. Keep up the good work. I’ve told all my friends with bikes about your site. Super product. – M. King
admin says
You’ve put together an absolutely great Kawasaki Ninja 250 online manual! – R. Stanfill
admin says
The Cyclepedia Ninja 250 manual is simple and quick to use. The instructions seem clear and logical. I am very happy with my choice in your service. – D. Mummah
admin says
Your Kawasaki Ninja 250 online service manual is an excellent service. Highly recommended for anyone needing to maintain their EX250 motorcycle. – M. Cooke
admin says
I have a Ninja 250 and needed repair information so I subscribed to Cyclepedia.com. This is a great manual – very clear pictures – an excellent value. – D. Beizer
gription says
Your Kawasaki Ninja 250 online repair guide is an excellent manual at a reasonable price! – J. Paulino
admin says
Your EX250 manual has been very helpful – this is a great service. – D. Verdiani
admin says
I just accessed your online Ninja 250 manual. Great service!!!! Super fast response time!!! – C. King
admin says
Great! I highly recommend your Ninja 250 online manual to anyone looking for Ninja 250 repair information. A. Simpson
admin says
I subscribed to the Cyclepedia Ninja 250 manual and it is better than I expected. Great product. – V. Alvarado
admin says
Love your online Ninja 250 manual! Great layout and plenty of model specific information for the 250. Keep up the good work. CR
admin says
In response to a question posted at http://www.kawasakimotorcycle.org/forum/mechanics-corner/13196-ninja-250-wiring-diagram-cdi.html#post944666
“Will a CDI off of a 1992 Ninja EX500 work on a 1992 Ninja EX250? I’ve got a Ninja EX250 that doesn’t have a CDI box, but I’ve got a good CDI from a 1992 Ninja EX500. The CDI off the EX500 has 11 wires going to it, and the 250 only has 7 wires.”
Unfortunately, the ignition box (which, by the way, is not a CDI box but is called an IC Ignitor box) from the EX500 will not work on the Ninja EX250. Not only is there a difference in the number and function of the wires, but the timing advance is different. The EX250 reaches its full advance of 42 degrees at 4,500 rpm, while the EX500 advances to 37.5 degrees at 10,000 rpm. Also be aware that the Ignitor box from the early 1986 and 1987 EX250s will not work on the 1992 model as the earlier version uses an analog type ignition and the later years have a digital system. These ignition boxes are very reliable, so if you find one on e-bay or at your local salvage yard for a decent price, I would not hesitate to buy it, in all probability it is still good. Good luck, the EX250 is a fine little sport bike and I hope you get yours running soon.
admin says
Thanks for creating the Ninja 250 manual! Ideal for my experience! Awesome color pictures make it easy! EB
admin says
I recently purchased a subscription to your online Ninja 250 manual and absolutely love it! I have already told a few people I know about how great this site is. This is a great product/service. Regards, Harris
admin says
I love your online Kawasaki Ninja 250 service manual, it has already been worth the money I paid for it! – Charles
admin says
The color images in your Kawasaki Ninja 250 manual are great. I’m gonna be doing a minor overhaul and these are exactly what I’ve been looking for. Thanks! -Robert