
The Honda CRF250L is a great bike to get into riding motorcycles. New owner’s and technicians will also find it a good bike to service and upgrade with fairly simple components and inexpensive OEM parts. A larger or more demanding rider very well may want to upgrade the the budget stock suspension. An aftermarket replacement is the only real upgrade option on the rear shock. The stock fork can be upgraded with custom internals.
The CRF250L forks are easy to work on, but the construction is a little different than what many folks may be used to. There is only a spring in right fork leg, and the left leg only has a damper. While much of the fork service is a standard affair there are a couple of special steps to consider.
Right Leg

On the right fork leg, start by loosening the fork cap. Turn the fork leg upside down to drain the fork oil into a suitable container. Pump the fork through its stroke at least a few times to release all of the oil.

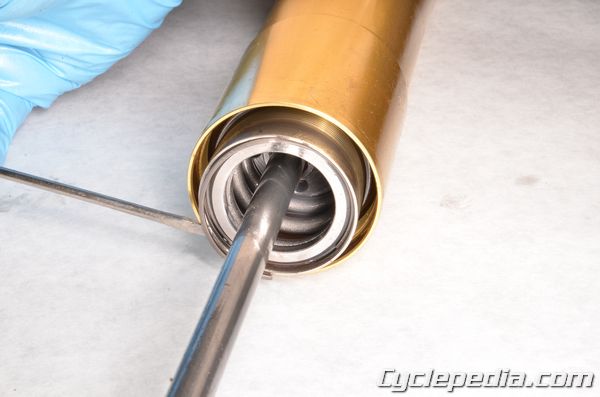
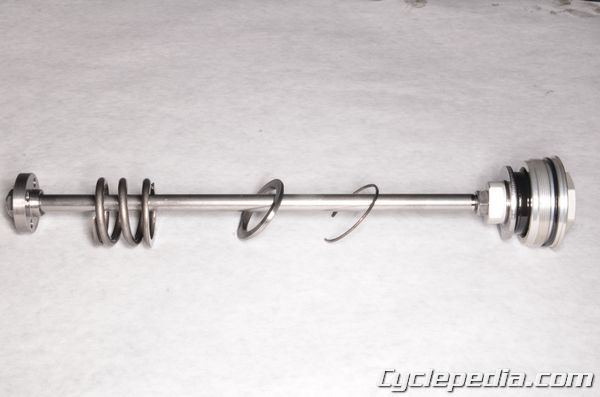
Push downward on the fork cap so as to compress the spring and use a small flat blade screwdriver to carefully remove the stopper ring from the groove in the pipe.

With the stopper ring removed, withdraw the fork cap and rod assembly from the pipe.

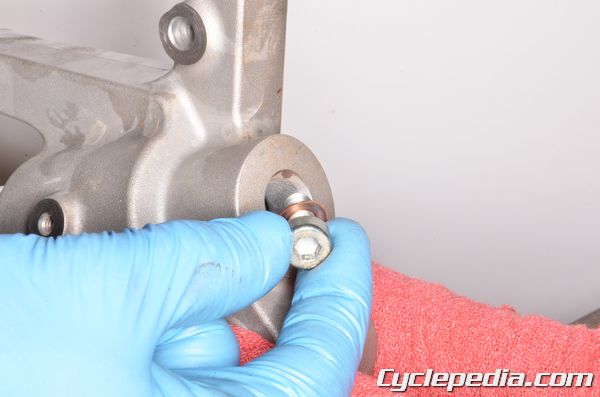
Loosen the lock nut using a 14 mm open end wrench while holding the base of the fork cap with a 17 mm wrench. Remove the fork cap from the rod.

Separate the inner and outer fork tubes and service the fork seals and bushings like a normal fork. Install the fork seals and bushings and join the fork tubes in the standard fashion.
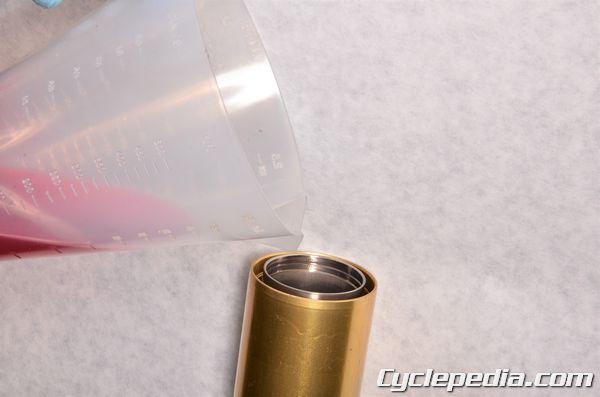
Pour the recommended type and amount of fork oil into the fork inner tube. Pump the fork tube slowly several times to distribute the oil inside the assembly. Compress the fork fully and allow the assembly to sit for at least 5 minutes to allow time for all bubbles to leave the fluid and the fluid level to settle. Then set the fork oil height height to specification and install the fork spring.
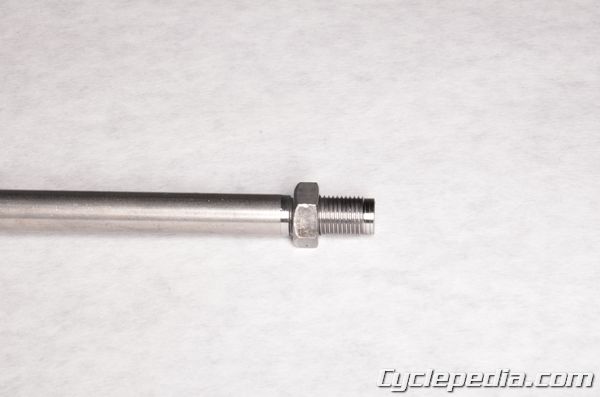
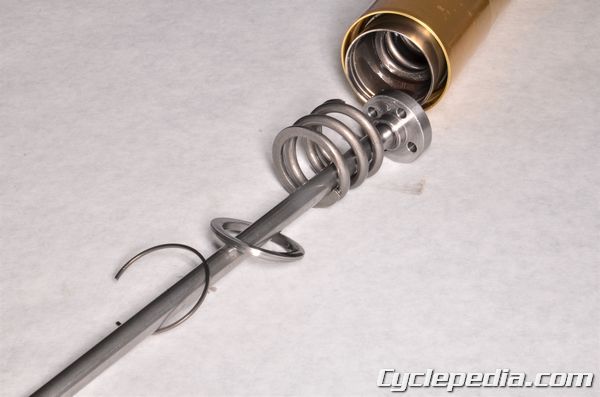
Run the lock nut down to the base of the threads on the rod.
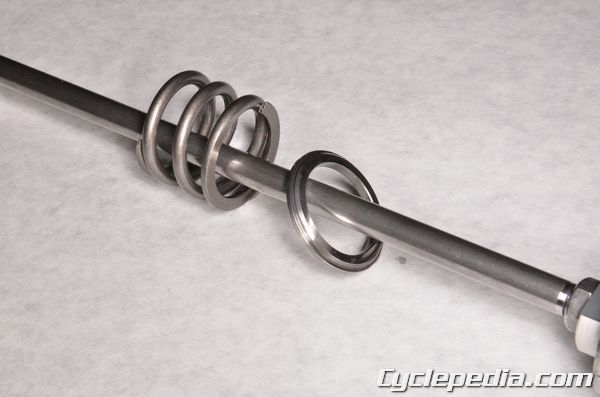
Install the rebound spring and the spring seat to the rod. Be sure to position the spring seat with the smaller beveled side facing upward toward the lock nut.
Place a new O-ring on the fork cap and coat the O-ring in fork oil. Thread the cap onto the damper rod until it bottoms on the threads. Using a 17 mm open end wrench to hold the cap from turning and a 14 mm wrench on the lock nut, tighten the lock nut to specification against the cap.
Install the stopper ring above the spring seat.

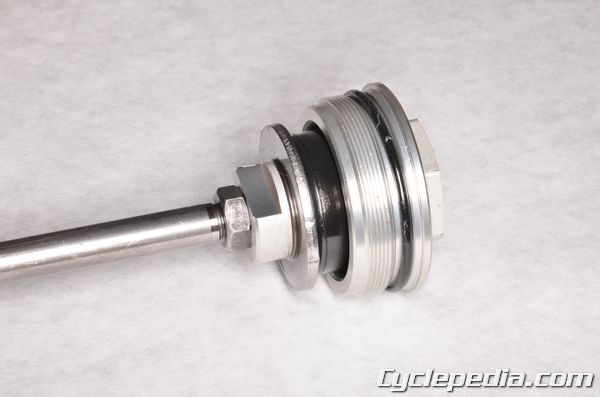
Insert the cap and rod assembly into the fork.


Push downward on the fork cap so as to compress the spring and seat the stopper ring into the groove in the tube.

Completely extend the outer tube, then thread the cap into place. Tighten the fork cap to specification.
Left Leg
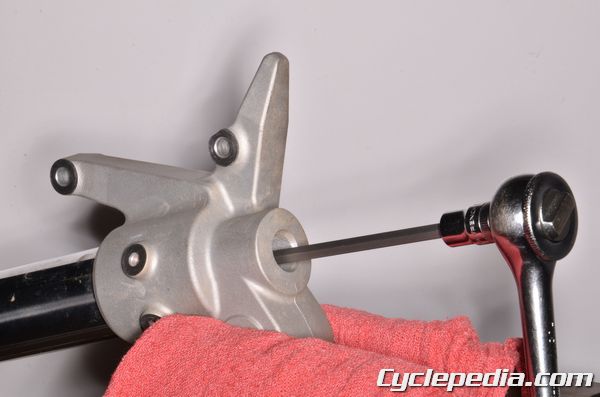
The left fork leg is a bit more conventional, but it’s missing a spring. Start with the bottom bolt. It needs to be loosened but not removed. Next loosen the fork cap. Separate the fork cap from the rod like on the right leg.

Remove the fork bottom bolt and damper unit. Continue dissembling the fork as normal.
Install the fork seals and bushings and join the fork tubes in the standard fashion. Install the damper unit and fork bottom bolt. Use a new sealing washer and non-permanent thread locking agent on the bottom bolt. Fill and bleed the fork oil as with the right leg.

Make sure to set the fork oil height as specified for the left leg.

Install the fork cap to the damper rod as with the right leg and tighten the locknut and fork cap to specification.
Check out the Cyclepedia Online Manual for the Honda CRF250L for all of the details and specifications or read about the manual here – https://www.cyclepedia.com/online-manuals/cyclepedia-honda-online-service-manuals/crf250l-honda-online-motorcycle-service-manual/


Leave a Reply
You must be logged in to post a comment.