

SAFETY FIRST: Protective gloves and eyewear are recommended at this point.
Rebuilding Starter Motors
It is possible to rebuild nearly every starter motor in use on a motorcycle or ATV, but before you start it’s best to do a little research. Checking at your local shop, you may find that a starter motor for your machine is fairly inexpensive. If that’s the case, it is hardly worth the effort of taking apart an ailing starter motor even to diagnose what may have gone wrong. If your replacement starter motor is on the pricey side, look deeper to see what replacement parts are available. Often you can replace the brushes, but if you have a bad armature and can’t get one you’ll be replacing the whole starter anyhow. The same situation exists with the end cap bearings—many machines list new end caps unavailable as a replacement part.
The best advice we can give is to use this chapter as a diagnostic tool. If your $200 starter motor only needs a set of $35 brushes to get going again, you can save some money doing a rebuild.
All starter motors follow a similar design, with a few differences according to use and individual brands. Here we will show you how to take the motor apart and troubleshoot problems, and how to get the starter back together and serviceable again. Individual specifications, such as armature coil resistance, brush length and commutator diameter will vary from each different starter motor, so use the specifications for your particular machine as the final guide when you’re examining the motor.
Disassembly
Starter Body
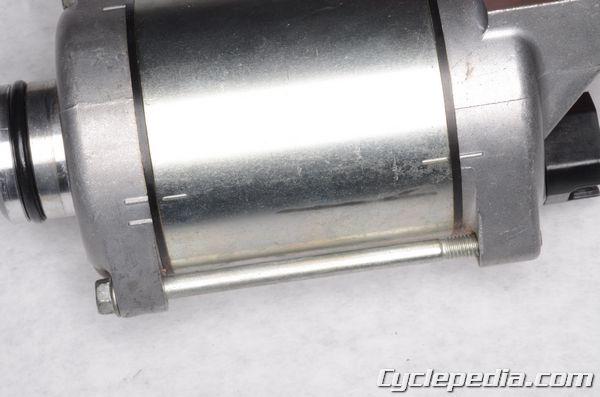
Look for a set of marks, or make a set of marks on the starter body to aid in reassembly.
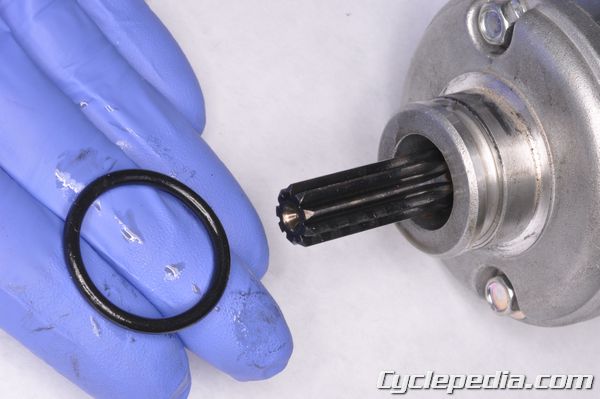
Remove the O-ring and discard it. Try to turn the starter motor armature shaft with your hand. It should turn with a small amount of resistance. If it doesn’t turn at all or is very hard to turn, the starter motor will need to be replaced or rebuilt.
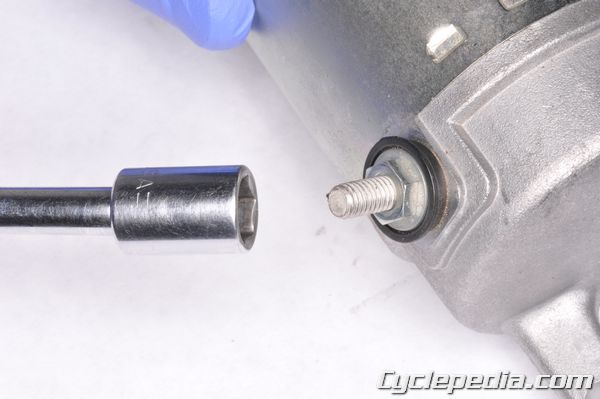
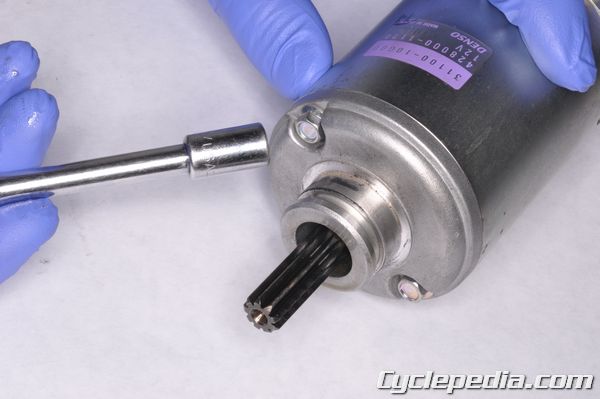
Remove the terminal nut with the proper size socket.
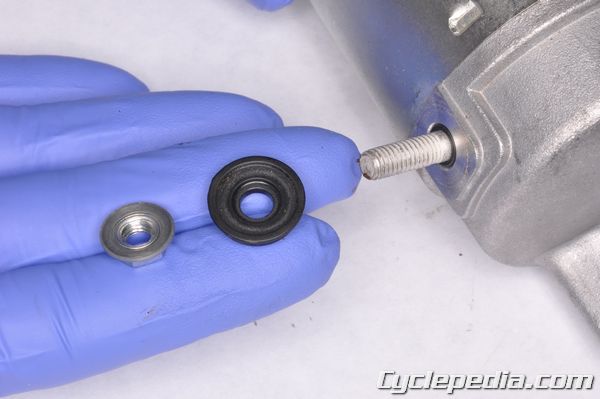
Keep track of the nut and any combination of insulators and washers that may come off the terminal.
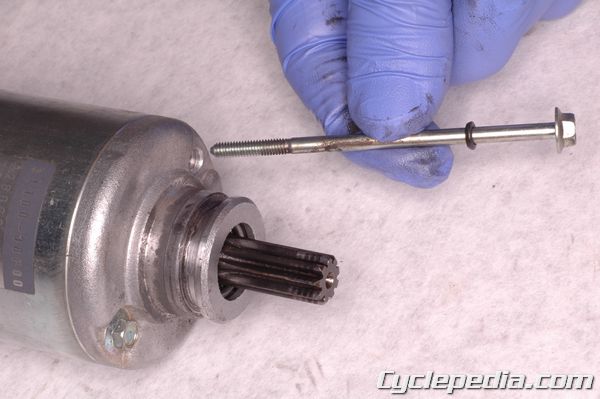
Remove the two bolts holding the starter motor together. The bolts commonly have a 7 mm head.
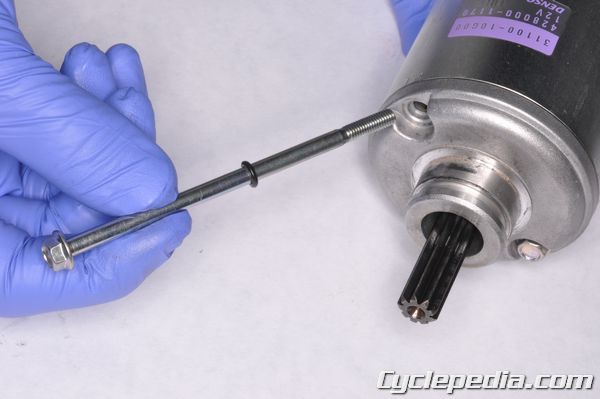
Do not lose the o-ring on the bolt shaft, and plan to use a new one upon reassembly.
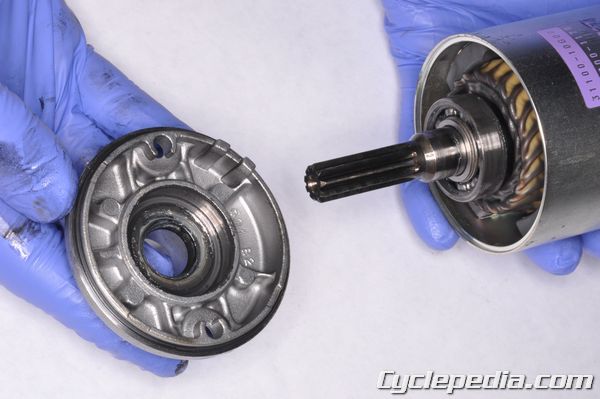
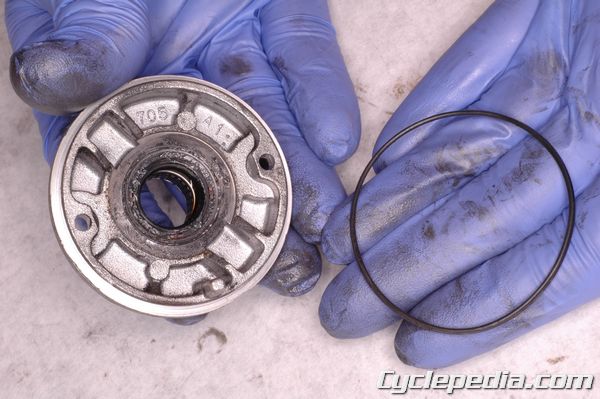
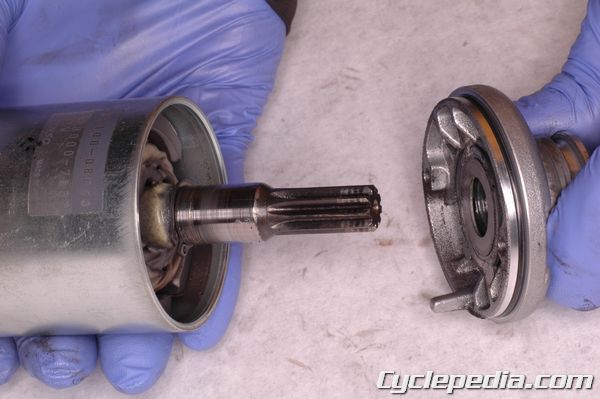
Remove the front cover from the starter motor.
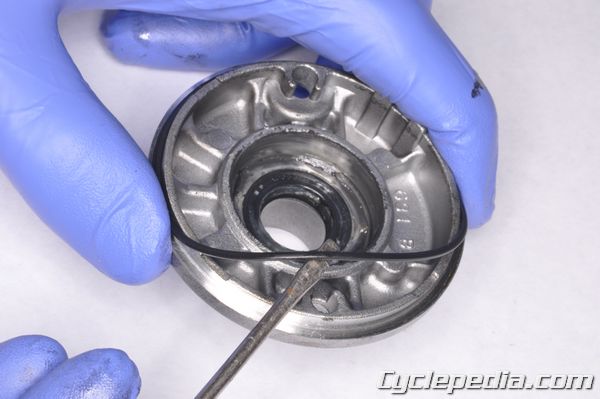
Carefully remove the o-ring from the front cover, and use a new one upon reassembly.
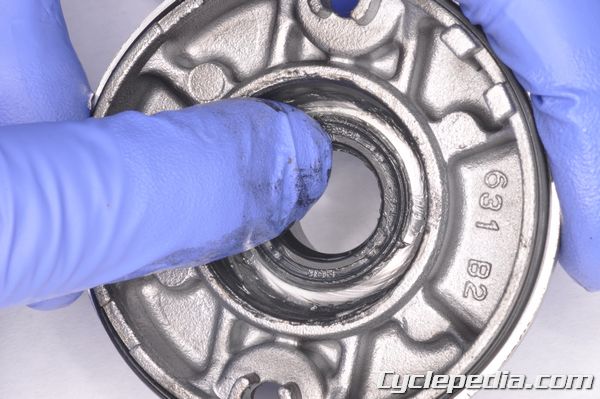
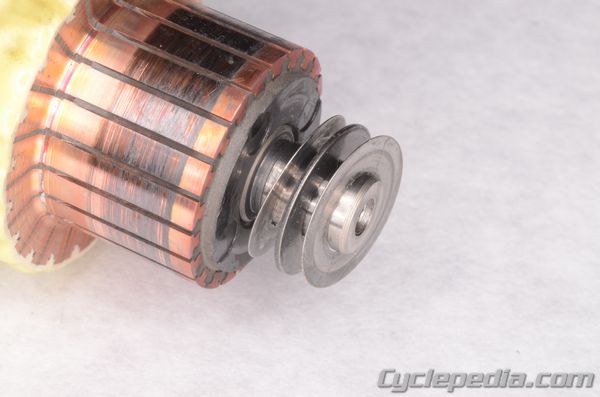
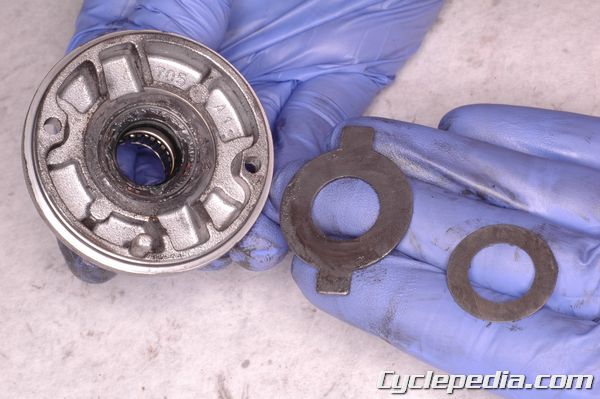
Check the condition of the bearing in the end cap. If it is obviously damaged, or if it turns roughly or feels notchy, you will need to replace the bearing or the entire end cap, depending on what is available for your vehicle in spare parts.
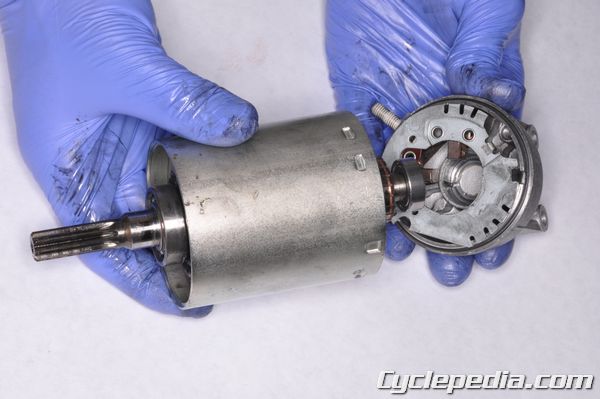
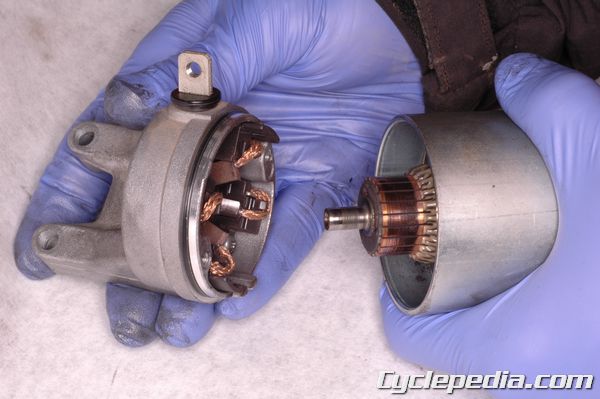
Remove the rear cover from the starter body. In some cases the bearing comes out with the armature shaft as above, and in others the bearing is fixed in the case. Either way, check the condition of the bearing and plan to replace it or the cap if it is bad.
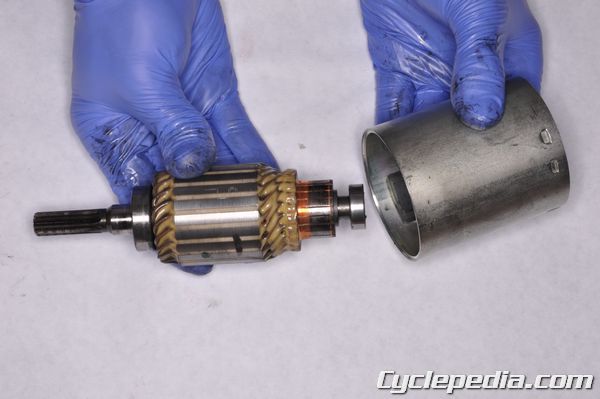
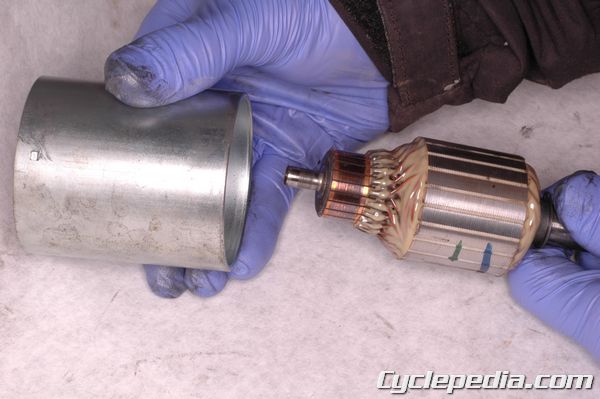
Remove the armature from the starter body.
Armature Inspection
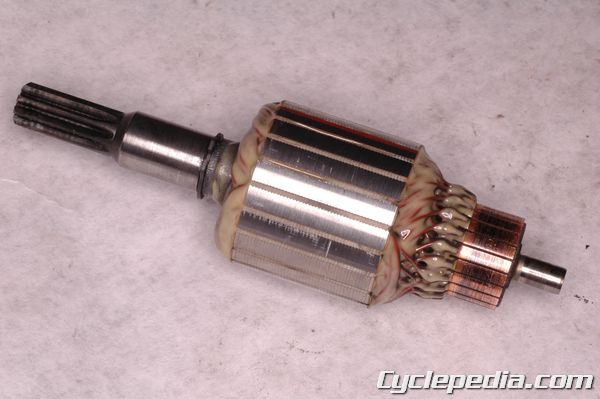
Inspect the armature for abnormal wear or damage.
Keep track of any shims on the commutator end of the armature, and return them to their proper place when finished.
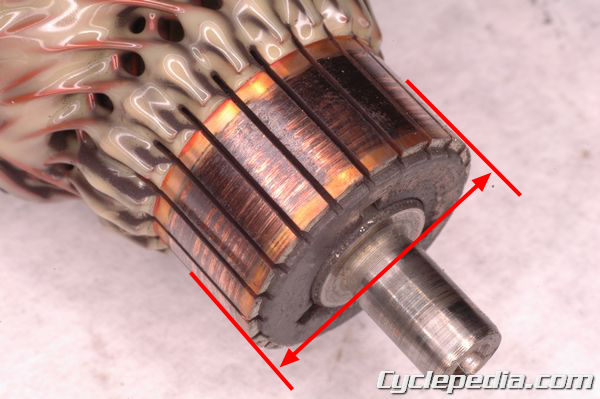
Measure the diameter of the commutator and compare your measurement to the service limit specified for your bike. If the commutator is worn past the service limit, replace the armature.
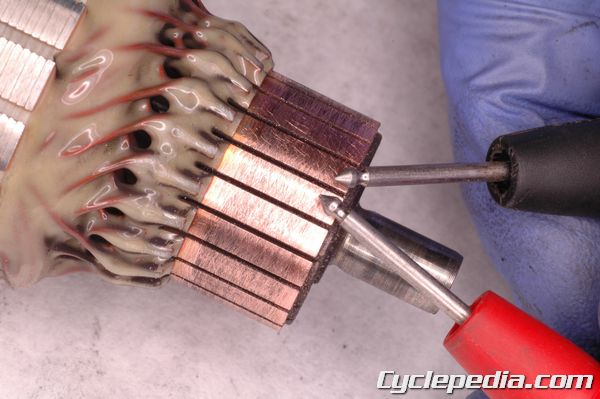
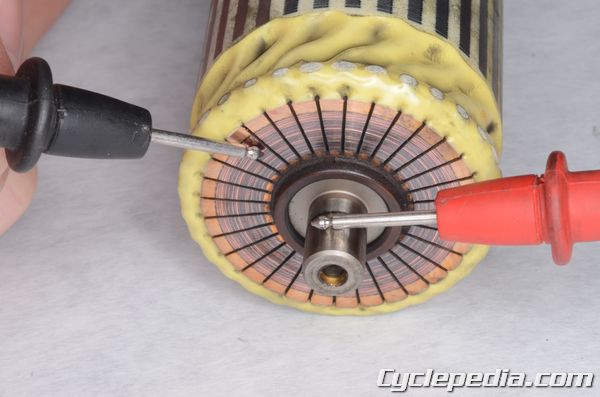
Using a digital multimeter set to measure resistance (Ω X 1), touch one meter lead to any one commutator strip and touch the other meter lead to all of the other commutator strips one by one. Polarity of the meter leads does not matter. There should be continuity for all of the readings, if any readings show no continuity there is an open circuit and the armature must be replaced.
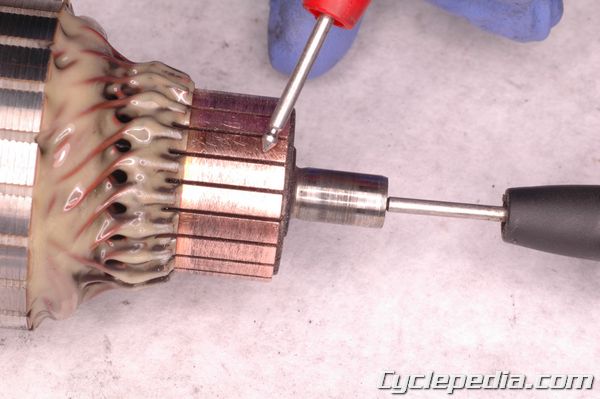
Next, touch one meter lead to the steel shaft of the armature and touch the other meter lead to each commutator strip. Polarity of the meter leads doesn’t matter. There should be no continuity. Continuity between the shaft and the commutator strip indicates a short in the windings, and the armature must be replaced.
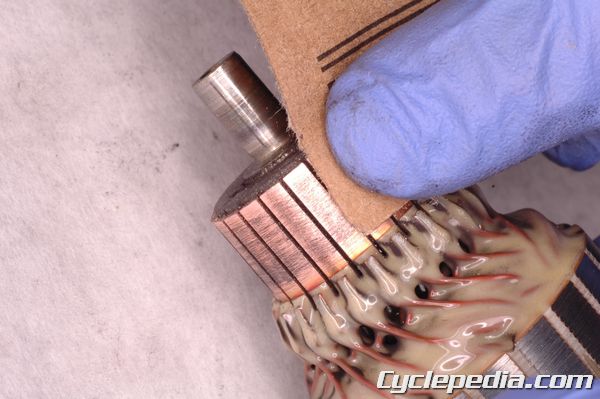
On most motors, the commutator can be cleaned up with a few gentle strokes of some 400 grit emery paper and cleaning with a dry shop rag.
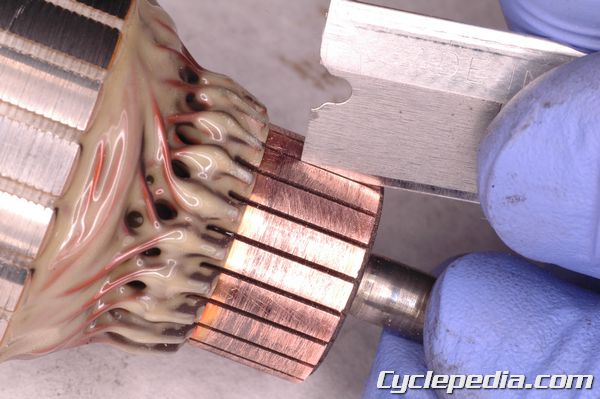
The other critical item in motor health is referred to as “mica depth” or “undercut,” which is the offset between the commutator strip and the underlying mica insulator. This strip, as shown above, should be cleaned out to a specified depth, usually somewhere between 0.5 mm and 1.5 mm. The mica undercut can be cleaned out with a razor blade, small screwdriver or hacksaw blade, just as long as the tool fits the groove it’s cleaning.
Honda’s unique CBR600RR starter motor with a flat commutator is tested in exactly the same way. Honda does not recommend using emery paper on the commutator, nor is it recommended that the mica undercut be cleaned out.
Brush Holder
The most common brush holders are mounted on a plate in the rear cover. Remove them by carefully removing the terminal post from the body, along with the brush holder.
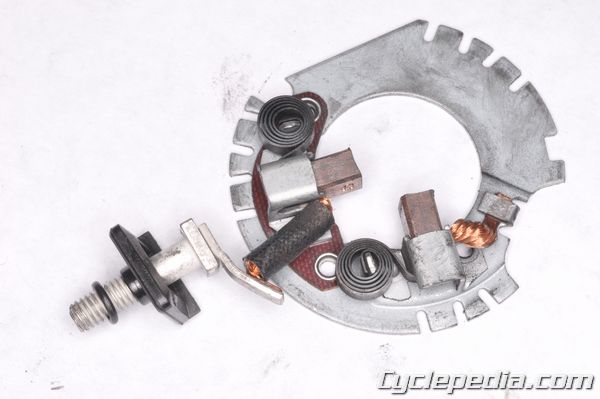
This brush holder uses two brushes.
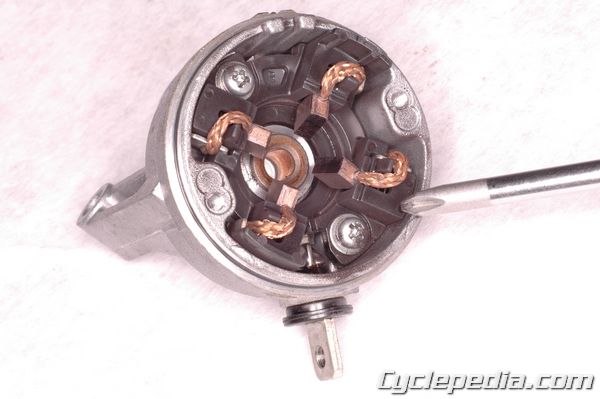
Here is a four brush holder that is held in by a pair of Phillips head screws.
Here is the four brush holder from a Honda CBR600RR that contacts the armature head-on rather than around the circumference. This design makes reassembling the motor body a much simpler process.
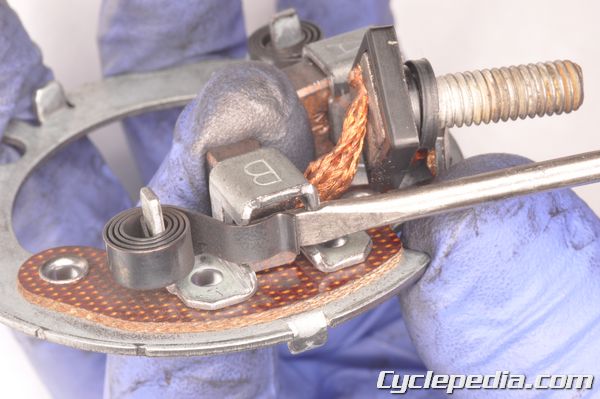
Remove the brushes by pulling back the spring and working the brush out the back of its holder.
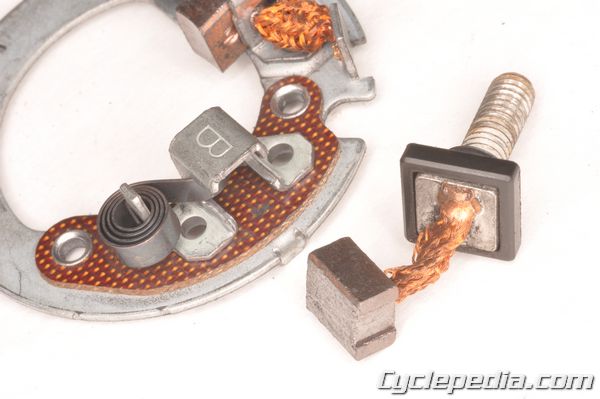
Measure the remaining working length of the brush and compare it to the specifications applicable to your machine, and replace as necessary. Of course, if you’ve torn the starter motor down to this point, your time would be better spent by putting new brushes in rather than worrying a few more millimeters of life out of the old ones.
Assembly
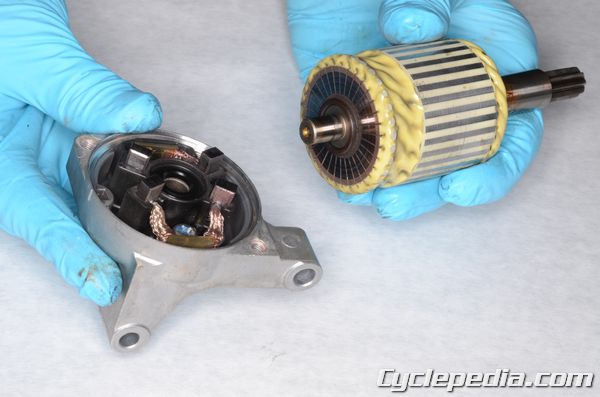
Insert the armature into the motor body.
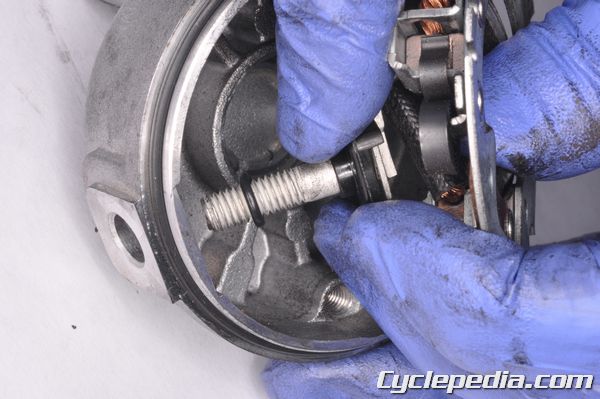
Insert the back cap onto the body, with a new o-ring in place. This can be a difficult task, since the commutator has to be fit between the spring loaded brushes. Note the position of the brushes in this photo—spread apart at the top to allow the commutator to fit.
Put a new o-ring onto the front cover, and grease the bear and seal lips.
Install any shims and lock rings into the cover.
Match the alignment marks and put the front cover onto the body.
Put a new o-ring onto each of the bolts and slide them into position. Tighten the bolts to the specifications given for your machine.
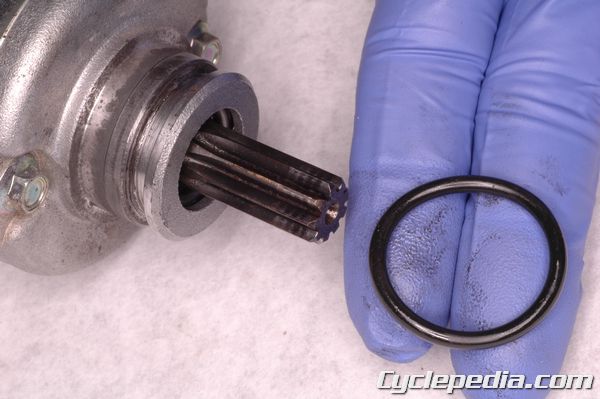
Fit a new o-ring onto the front of the motor with a light coat of grease, and it is ready to be installed.