SAFETY FIRST: Protective gloves and eyewear are recommended at this point.
Shock Absorber Settings
Sag
To set the sag you will need two helpers. Race sag should be approximately one third of the total suspension travel.
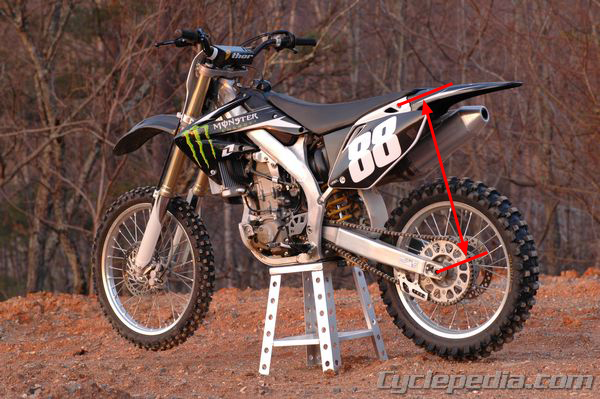
You will need to take three measurements of the rear suspension. Measure from the rear fender mounting bolt to the chain adjuster lock nut or other appropriately placed items depending on the vehicle.
The first measurement you should take is a totally unloaded bike. Place the bike on a jack or stand so the rear suspension is fully extended. Take your measurement. We will call this measurement “U” for unloaded.
Next, measure with the rider on the bike with full equipment and gas, as if you are about to race or ride. Have one of your helpers steady the bike so the rider can place his feet on the foot pegs. The bike should be as close to perfectly upright as possible. The rider should sit at the very front of the seat. Take a measurement from the same points you did on the unloaded measurement. We will call this measurement “L” for loaded.
Race Sag = U – L
To determine race sag subtract L from U. The 2007 CRF450R specification for race sag is 100 mm or 3.9 in. Stiffen the preload to decrease sag, and soften the preload to increase sag. Decreasing the sag from the standard will make the bike turn quicker at the expense of some stability. Increasing the sag from standard will increase stability in areas with less turns, but will slow the turning of the motorcycle.
Preload
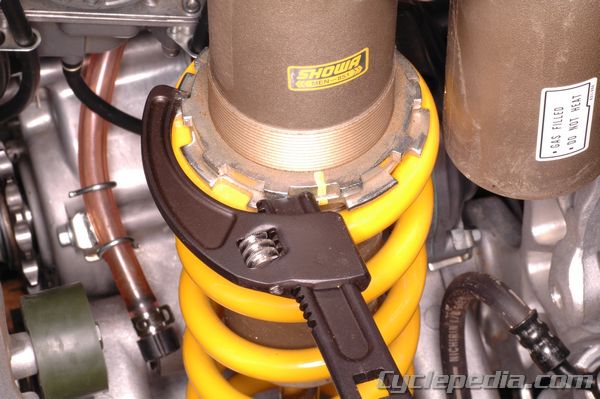
To adjust the preload, loosen the preload lock nut with a pin spanner.
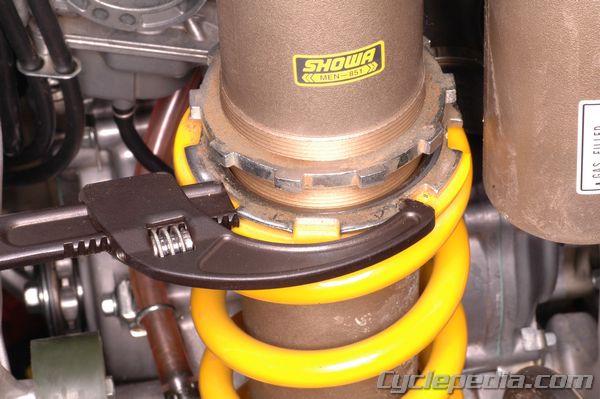
Turn the adjuster with a pin spanner. Tighten the adjuster to increase preload and decrease sag.
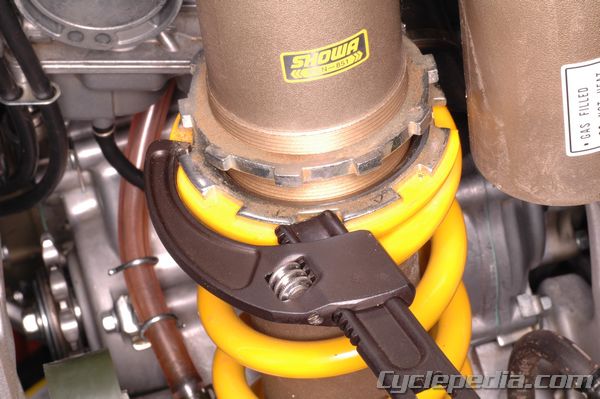
Loosen the adjuster to decrease preload and increase sag.
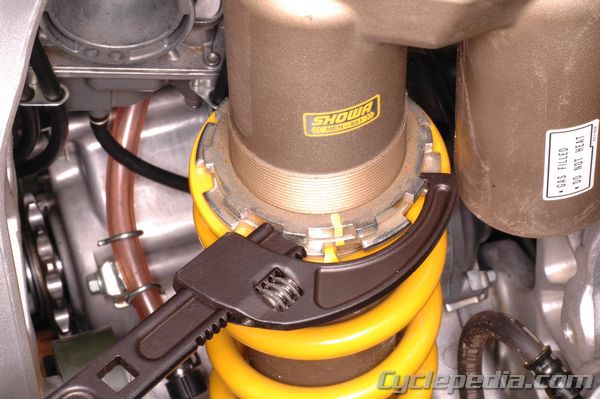
Torque the lock nut to specification when finished.
The next step is to make sure the bike is equipped with the proper shock absorber spring rate for the rider weight. Take a measurement with the motorcycle on the ground, but without the rider on board. Call this measurement F for free.
Free Sag = U – F
The 2007 CRF450R specification for free sag should is 10 – 25 mm or 0.4 – 1.0 in. If the free sag is not in this range (race sag must be set) you need a different spring weight for the best suspension action. If the free sag is more than 25 mm, the spring on the bike is too stiff. If the free sag is less than 10 mm the spring is too soft. Switching to the more appropriate spring weight will make a huge difference in suspension response while riding.
Compression Damping
Hazard: Shock absorbers often contain pressurized gas. Do not remove damping components or adjust settings without proper knowledge.
Always make damping adjustments from full hard and then going to your desired setting.
The compression damping adjusters control the amount of damping during the compression stroke of the shock absorber. The shock absorber may have one, two, or no compression adjusters. If the shock has two compression damping adjusters usually one is for high speed and one is for low speed.This refers to how fast the suspension is moving through its stroke.
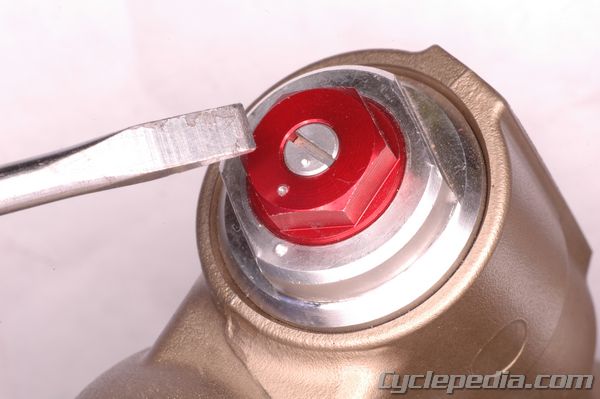
On our example machine (Honda CRF450R) the small adjuster is for low speed damping. Turning the adjuster in increases, or stiffens, the compression damping. Turning it out decreases the amount of low speed compression damping.
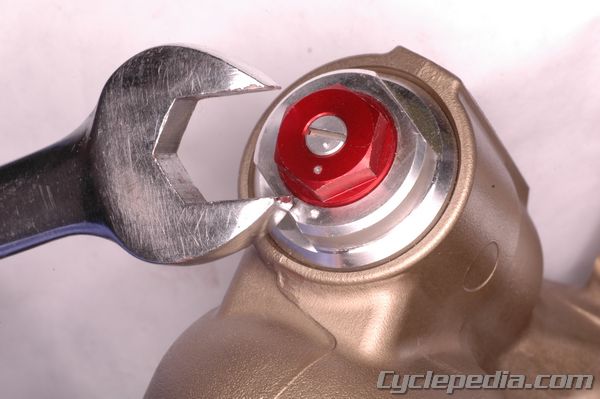
The large hex adjuster is for high speed damping. Turning the adjuster in increases, or stiffens, the compression damping. Turning it out decreases the amount of high speed compression damping. Consult your owner’s manual or specific service manual for more information and recommendations.
Rebound Damping
Hazard: Shock absorbers often contain pressurized gas. Do not remove damping components or adjust settings without proper knowledge.
Always make damping adjustments from full hard and then going to your desired setting.
Rebound damping controls the how quickly the shock extends after being compressed. The shock absorber may or may not have a rebound damping adjustment, depending on the machine.
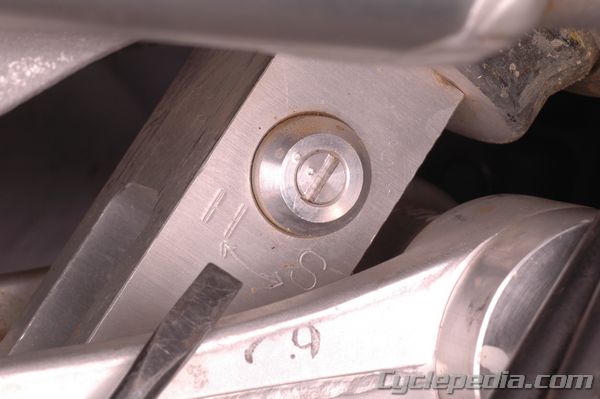
On our example model the rebound adjuster is located on the bottom of the shock absorber. Turning the adjuster in increases, or stiffens, the rebound damping. Turning it out decreases the amount of rebound damping. When the punch marks are aligned on this shock, it indicates being set at the factory recommendation. Consult your owner’s manual or specific service manual for more information and recommendations.
Fork Settings
Compression Damping
Some motorcycle front forks feature adjustable damping. Your machine may or may not include the full range of adjustments noted below.
Always make damping adjustments from full hard and then going to your desired setting.
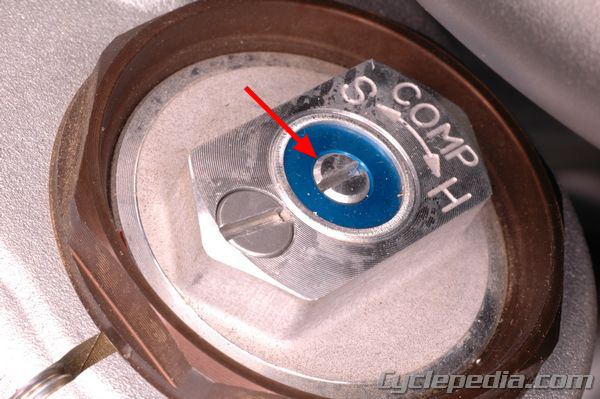
On our example CRF450 the compression damping adjuster is located on top of the fork cap. Turning the adjuster in increases the compression damping, and turning it out decreases the damping. Always make sure the adjusters are adjusted the same between both fork legs, and that the adjusters aren’t stuck between clicks.
Rebound Damping
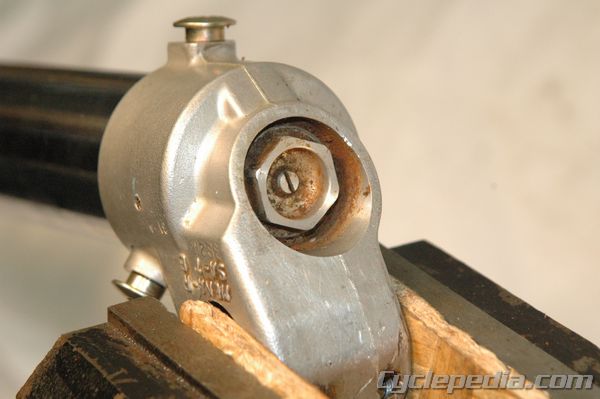
The rebound damping adjuster is located on the fork center bolt on the bottom of the fork. Turning the adjuster in increases the amount of rebound damping, and turning it out decreases the rebound damping. Like the compression adjusters, always make sure the adjusters are adjusted the same between both fork legs, and that the adjusters aren’t stuck between clicks.
Air Pressure Vent
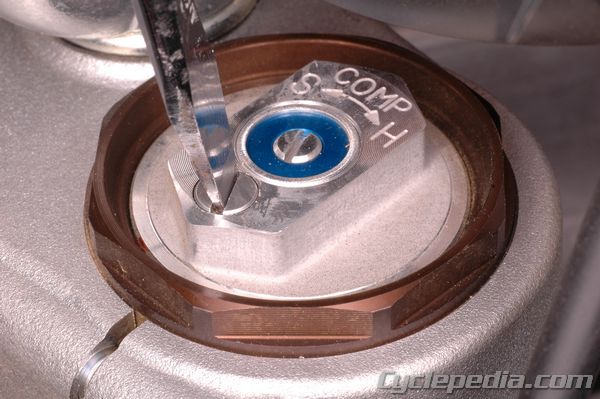
Off road forks often have a pressure release screw to vent pressurized air from the forks. Vent the forks after every race or hard ride, by raising the front end of the bike and opening the screw until you here the hiss of escaping air pressure. Tighten the screw when finished.
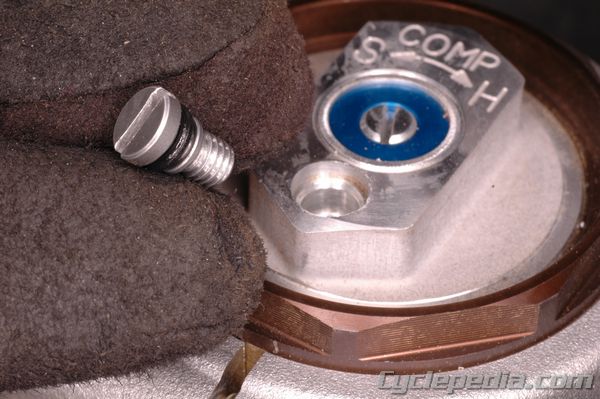
Inspect the O-ring on the screw occasionally, and replace it if it is damaged. Tighten the screw with a small flat blade screw driver after you have vented the air pressure.


Recent Comments