SAFETY FIRST: Protective gloves and eyewear are recommended at this point.
Chain final drive is the most common form of final drive on motorcycles and ATVs and has been used for over 100 years. The advantages are that it is relatively simple and inexpensive, does not consume much power and is easily re-geared to suit different riding conditions. The disadvantages are that it is noisy, messy and high maintenance compared to belt drive or shaft drive.
Inspection
[external-vfe name=”chain1″]
Before riding, the drive chain should be checked to make sure that it’s adjusted and lubricated properly. The chain should be cleaned and re-lubricated when your ride is complete while the chain is still warm. This will allow the lubricant to penetrate the rollers and pins better.
When cleaning the drive chain use a suitable cleaner that will not destroy the O-rings if it is an O-ring type chain. Kerosene will do a good job cleaning most chains but pay particular attention not to soak your O-ring chain in the solvent. After a long soak, the solvents can get inside of the O-rings and destroy whatever lubricant remains, while the O-rings can make it difficult to re-lubricate the chain. It is best to just brush off an O-ring chain with a stiff bristle brush and at most wipe it down with a solvent-soaked rag, or use a tool such the Grunge Brush.
Always use a quality chain wax or chain lube. If it’s an O-ring type chain, make sure the label on the can of chain lube indicates it is approved for use on O-ring chains. Many service manuals recommend using engine oil or gear oil to lubricate the chain, but these will sling off easily. Commercial chain lube is specially formulated to stick to the chain and will provide better lubrication and less mess.
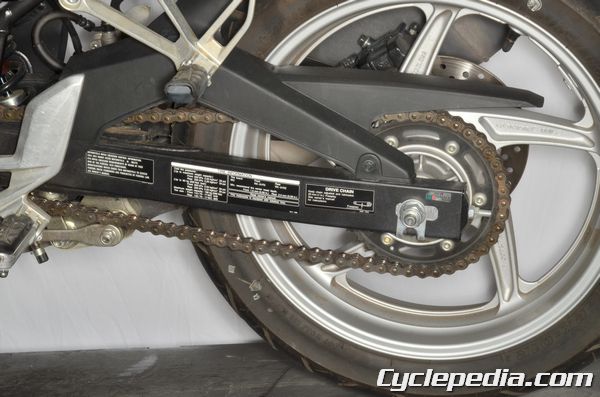
Check the chain slack by lifting up on the chain with your finger half-way between the front and rear sprockets, usually under the swingarm. Refer to your service manual for specific details or in most cases the information will be located on the swing arm. This will indicate how much slack is in the chain.
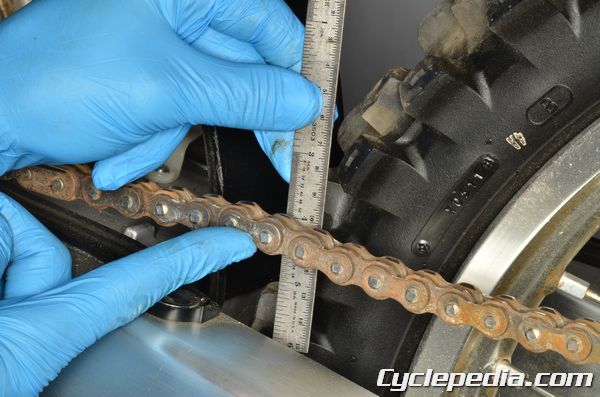
On some models, the chain free play is checked by pulling up on the chain above the swing arm. Check your service manual for the chain slack specification and method of inspection. If the slack is out of specification you will need to adjust it.
Adjustment
Before adjusting the chain, rotate the rear wheel at least one full revolution and check for tight spots in the chain. If the chain has any tight spots it will be more difficult to adjust correctly. Replace the drive chain if tight spots are excessive. It is best to replace both sprockets when replacing the drive chain.
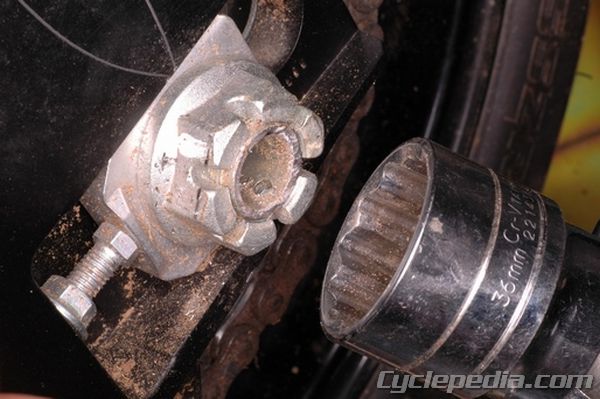
Before adjusting the drive chain, loosen the rear axle nut two or three turns.
There are several types of chain adjusters currently being used: The pull-back type, the push-back type, the snail cam type and the eccentric type.
Pull-Back Type
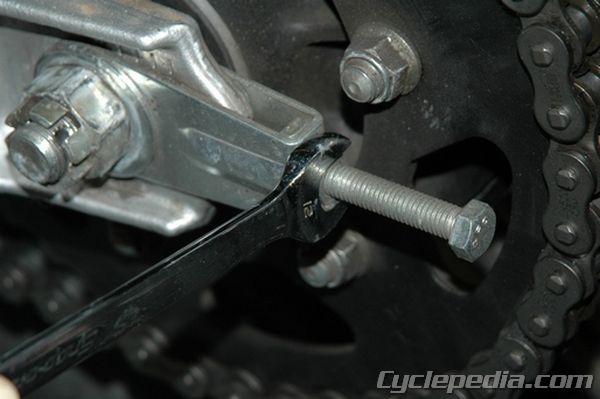
To adjust the pull-back type of adjuster, first loosen the lock nuts.
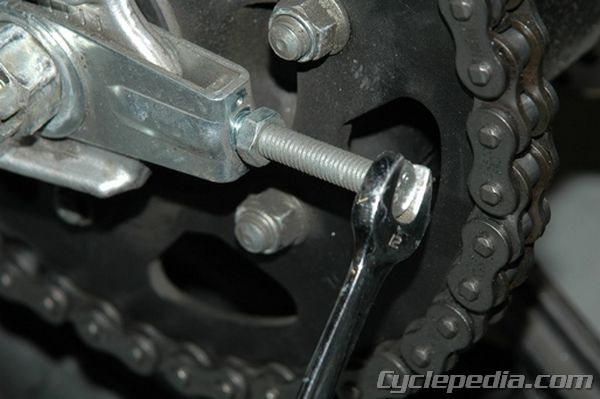
Then turn the adjuster bolts until the proper chain slack is obtained. Make sure to adjust both sides evenly and that the same marks on the swingarm are aligned on each side. Tighten the lock nuts securely when finished, then tighten the axle.
Push-Back Type
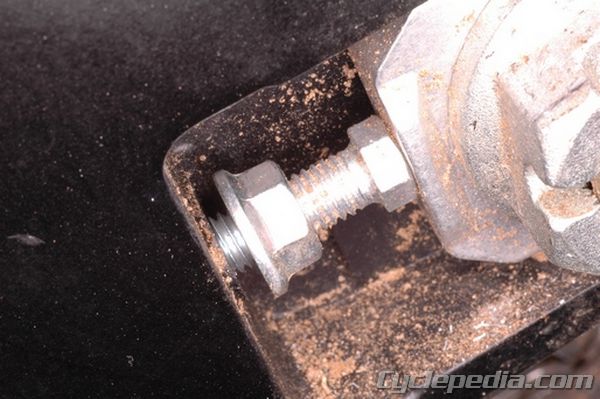
To adjust the push-back type of adjuster, first loosen the lock nuts.

Then turn the adjuster bolts until the proper chain slack is obtained. Tighten the lock nuts securely when finished, and tighten the axle to specification.
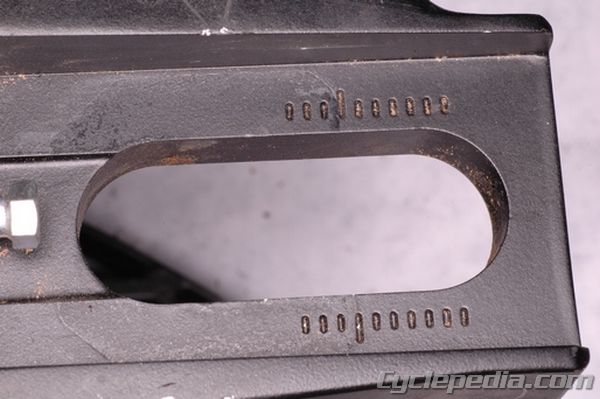
Make sure the axle carrier is aligned with the same number line on both sides of the swing arm for proper rear wheel alignment.
Snail Cam Type
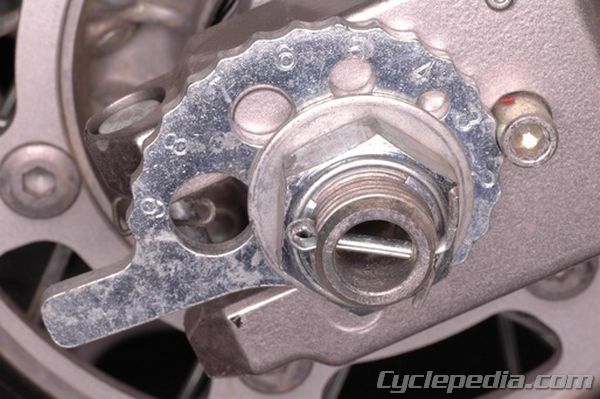
To adjust the snail cam type of adjuster, loosen the axle and then rotate the snail cam until the proper chain slack is obtained. Make sure the peg on the swing arm is located between the same two numbers on each side of the swing arm for proper rear wheel alignment.
Eccentric Type
To adjust the eccentric type of adjuster, rotate the axle carrier until the proper chain slack is obtained.
Torque the axle nut to specification and replace the cotter pin with a new one where applicable.
Removing and Installing a Clip Type Master Link
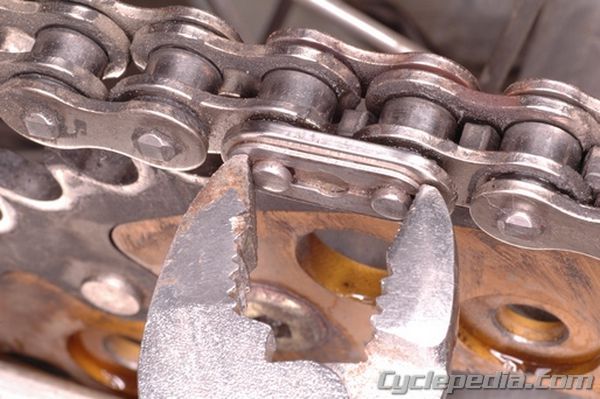
To remove the clip type master link, use a pair of slip joint pliers to push the open end of the master link clip towards the chain link pin at the closed end of the clip.
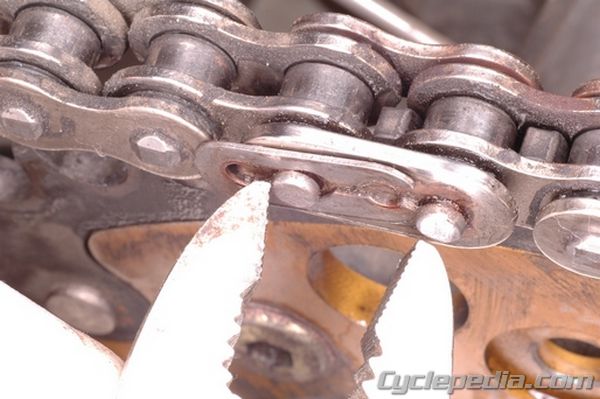
Once you get the hang of this technique you will be able to remove the master link clip without damaging it.
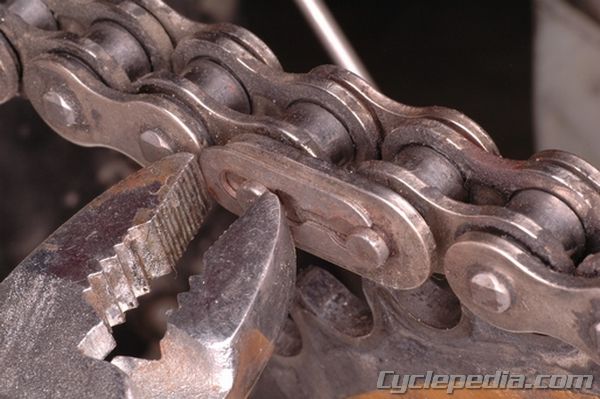
Install the master link side plate and pop the clip in position by using your slip joint pliers to push the closed end of the clip against the pin next to it. The closed end of the clip has to point in the direction of chain rotation so it doesn’t fly off if the chain contacts something on the trail.
Click the video below for a demonstration of spring clip removal.
[external-vfe name=”MasterLinkRemoval”]

