Ball Bearings
Codes
The numerical four digit code stamped into a ball bearing indicates its inside diameter (ID) and outside diameter (OD). There may also be a letter or letters that indicate whether it is sealed, and if so, the number and type of seal(s) used. The bearing codes are particularly useful if you are replacing a shaft (such as an axle) with a different diameter one.
| Code | ID | OD |
| 6000 | 10 mm | 26 mm |
| 6200 | 30 mm | |
| 6300 | 35 mm | |
| 6001 | 12 mm | 28 mm |
| 6201 | 32 mm | |
| 6301 | 37 mm | |
| 6002 | 15 mm | 32 mm |
| 6202 | 35 mm | |
| 6302 | 42 mm | |
| 6003 | 17 mm | 35 mm |
| 6203 | 40 mm | |
| 6303 | 47 mm | |
| 6004 | 20 mm | 42 mm |
| 6204 | 47 mm | |
| 6304 | 52 mm | |
| 6005 | 25 mm | 47 mm |
| 6205 | 52 mm | |
| 6305 | 62 mm | |
| 6006 | 30 mm | 55 mm |
| 6206 | 62 mm | |
| 6306 | 72 mm | |
| 6007 | 35 mm | 62 mm |
| 6207 | 72 mm | |
| 6307 | 80 mm |
The letter U indicates a single metal seal.
The letter Z indicates a single rubber seal.
The letters UU indicate double metal seals.
The letters ZZ indicate double rubber seals.
Replacement
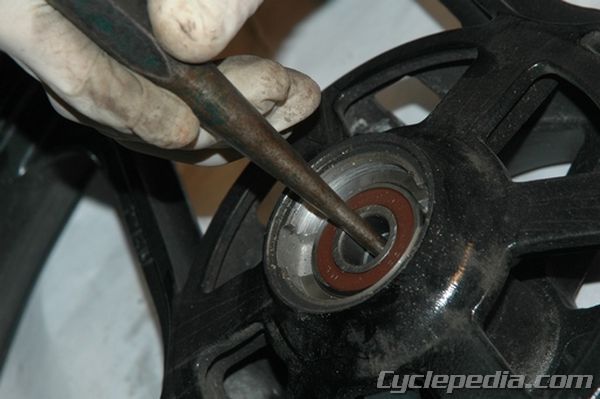
Ball bearings can be removed using a bearing removal tool or a flat faced punch and a steel hammer. Heating the component around the ball bearing with a heat gun will make removal (and installation) much easier. Once a ball bearing has been removed, it should be replaced with a new one.
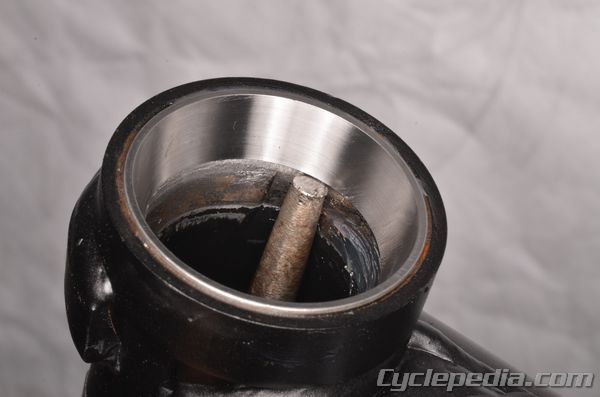
To remove a bearing with a punch, set the tool up against the edge of the race working from the opposite side. This will work with wheel bearings and with steering head races, as shown. Work your way around the bearing race and knock it out with a series of light taps with a hammer.
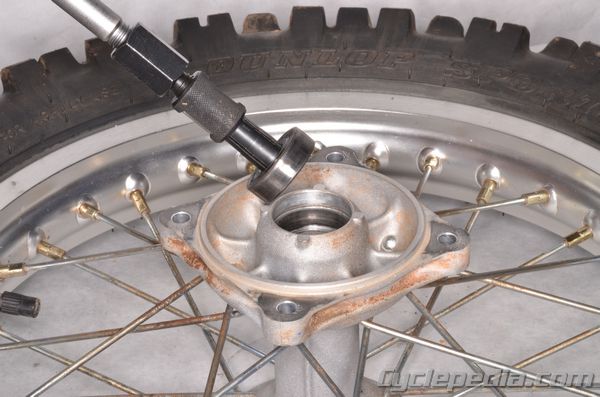
The easiest way to get bearings out is with a bearing remover tool. This tool is inserted into the inner race and tightened firmly. Then a slide hammer is used to pull the bearing out of the part being serviced.
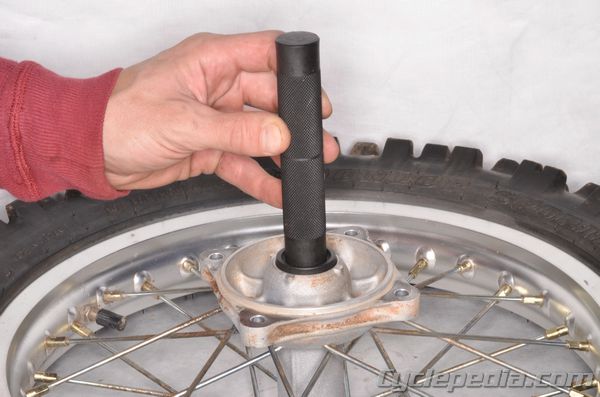
When installing a new ball bearing, use either a bearing installation tool or a socket with the same outside diameter as the OD of the bearing, and a steel hammer. Never install a ball bearing into a wheel or engine case by driving on the inner race, as this could damage the bearing. However, if installing a bearing onto a shaft, such a steering stem or crankshaft, only use the inner race to drive it on. Placing the ball bearing in the freezer for about an hour and heating the component with a heat gun will make installation of the bearing into a wheel or engine case much easier. Heating the bearing will make it easier to install onto a shaft. Install ball bearings with the numbers stamped into them facing out.
Plain Bearings
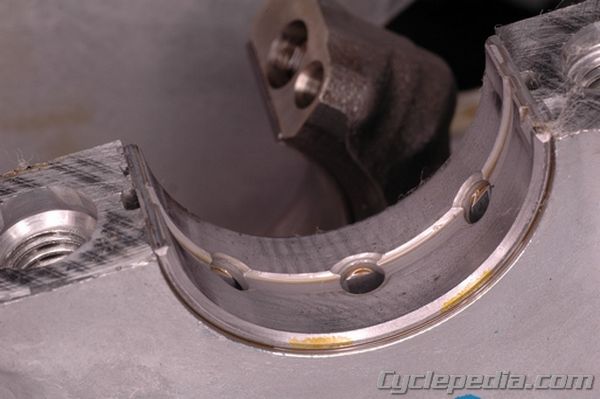
Plain bearing inserts are commonly used for crankshaft and connecting rod bearings. They may be one piece or (more commonly) two piece and come in different thicknesses to adjust the oil clearance between the crankshaft and the engine cases and connecting rod(s). The bearing thickness is usually indicated by a color code applied to the edge of the bearing (yellow in the photo). The oil clearance for plain bearings is critical to the life of the engine and can be checked using Plastigage.
Checking Clearance with Plastigage
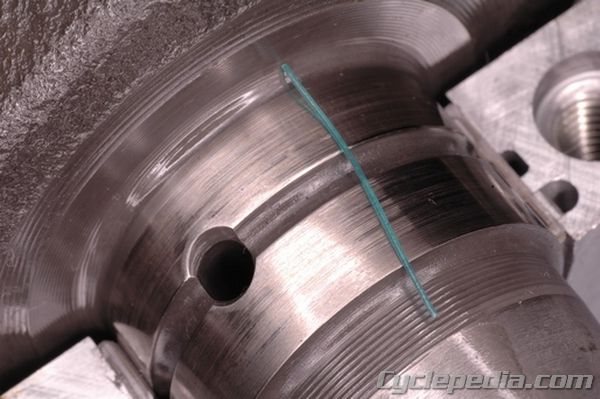
Clean the bearing journals and bearings using aerosol brake cleaner and a lint free cloth. Break off a short length of Plastigage and lay it on the bearing journal. Avoid the oil hole location.
Place a film of engine oil on the threads and mating surface of the bolts. Install the connecting rod cap if checking connecting rod bearing oil clearance, or join the two crankcase halves together if checking main bearing oil clearance, and torque the bolts to specification. Be very careful not to move the connecting rod on the crankshaft or the crankshaft in the engine cases as this will smear the Plastigage and make your reading inaccurate.
Loosen and remove the connecting rod cap bolts or engine case half bolts, again being very careful not to turn the components.
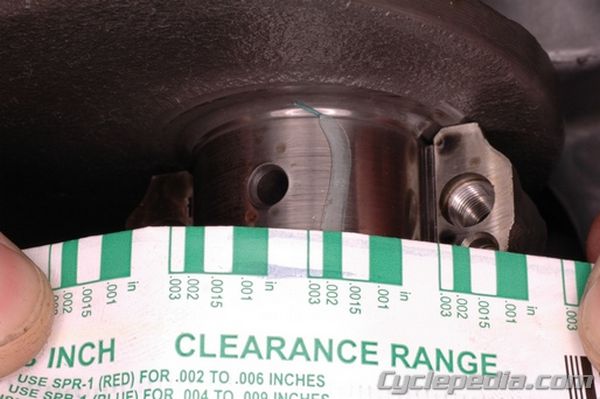
The Plastigage package has a measuring scale printed on it. Using the widest area of the compressed Plastigage, hold the scale so one of the bands most closely matches the width of the Plastigage. In the photo, the Plastigage is a little wider than the .002 band, but not nearly as wide as the .0015 band, so the reading would be .002 inches. This is what the oil clearance is for this bearing. The wider the Plastigage, the smaller the oil clearance. Compare your readings with specification in your service manual. If the oil clearance is not within specification, refer to the service manual as to how you would select the proper replacement bearing(s).

