SAFETY FIRST: Protective gloves and eyewear are recommended at this point.
An “endless” chain is a factory or dealer-installed chain that does not use a master link. You may hear in passing that an endless chain demands removing the swingarm to replace, but it’s not true. “Endless” chains are serviced very similar to a master-link chain. In the process the pins are pressed out of a link, and the old chain is removed. The new chain is then installed to length and a staking tool is used to mushroom the ends of the connecting pins to permanently attach the sideplate to the pins. It’s a process that is not much more difficult than dealing with a master link, once you have the right tools.
Chain Tools
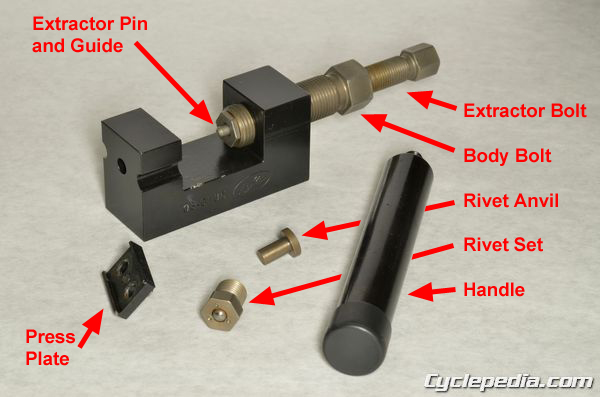
We used the Motion Pro Jumbo Chain Tool in the demonstration below. Motion Pro tools are commonly available at motorcycle dealerships and they are very high quality. The Motion Pro tool will separate, or “break,” up to a size 630 chain, but it will only rivet a chain up to size 530. You will need a different brand tool to handle a 630 chain.
Removal
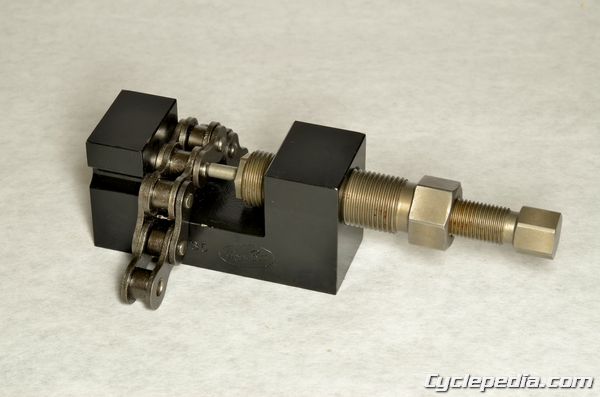
To remove an “endless” chain, you first have to remove, or “break,” a pin.
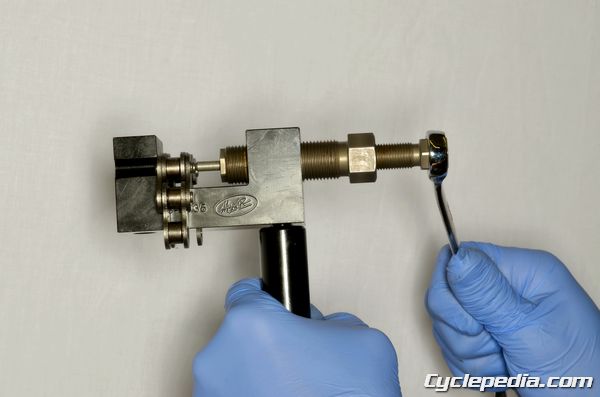
Fit the chain into the tool so that the extractor pin is aligned with a chain pin. This picture is just for show, in an actual case you would snug the body bolt down onto the chain with a 13/16 wrench so that the pin would not show. Then tighten the extractor bolt with a 9/16 wrench until the chain pin is pushed out.
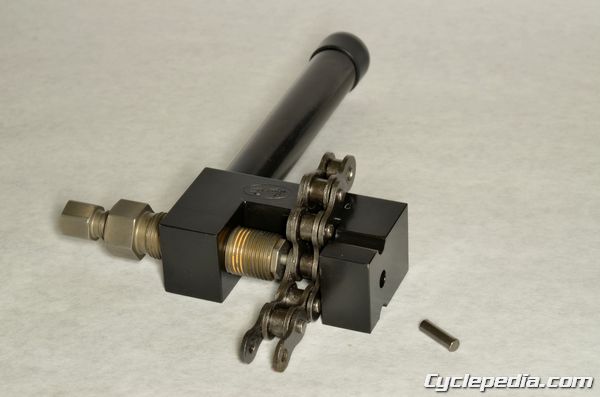
The chain pin will fall out of the hole in the back of the extractor tool. Remove the tool, separate the links, and remove the chain from the bike.
Installation

The replacement link should be assembled as shown: From left – master link, o-ring, chain rollers, o-ring, side plate. This photo shows a typical clip-type master link, where an actual “endless” master link would not have a clip groove.
The Motion Pro tool as pictured is made to stake the links of a hollow point master link, which is identified by the presence of a dimple in the end of the link pin. A number of aftermarket chain manufacturers make replacement chains with solid, hardened pins that require a different rivet set and anvil for this tool. The part number from Motion Pro is 08-0142, and it’s called a Quad Stake kit.
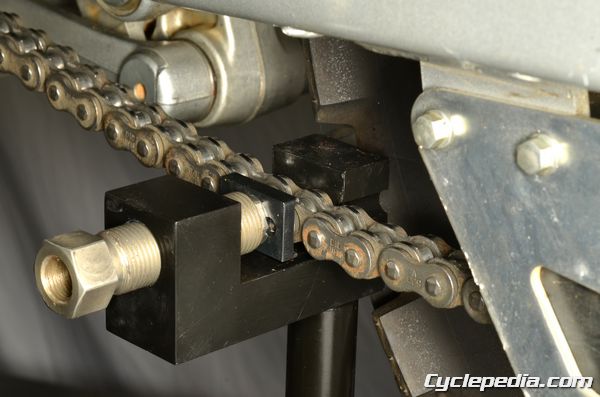
To attach a master link, grease is applied to the chain and the master link side plate, and the press plate is installed in the tool. Tighten the body bolt with a 13/16 wrench and press the plate onto the pins of the master link. The chain manufacturer will specify a height to which the pins should protrude from the side plate of the master link when properly pressed on.
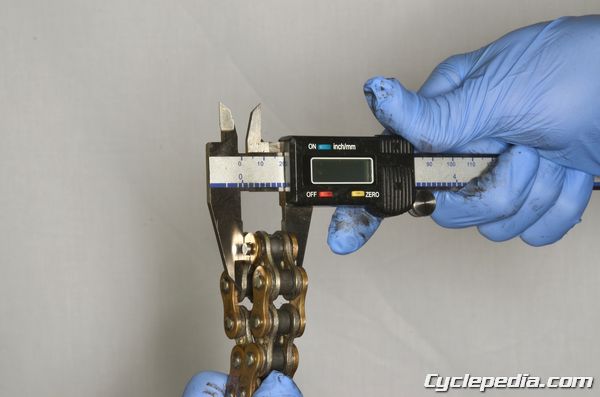
Determine the height of the pressed-on link by measuring with a vernier caliper. Typical would be somewhere around 1.2 to 1.4 mm (0.047 – 0.055 in) but it is important to have the chain manufacturer’s actual recommendation for this. When the link is pressed on properly, you can finish the installation by staking the master link.
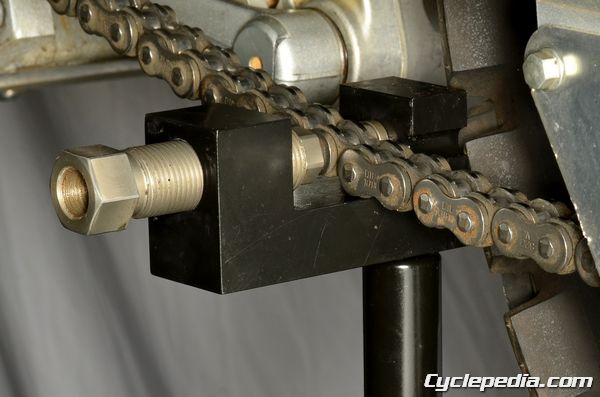
Assemble the tool with the rivet set mounted in the end of the body bolt, and the anvil plate in the body hole of the chain tool. Tighten the body bolt with a 13/16 wrench and watch the pin head mushroom. Remove the tool and measure as you go, since the amount of mushrooming allowed on the master link pin is also dictated by the chain manufacturer.

The diameter of the staked area of the pin is usually measured as shown. The bike we’re working on has a staked area specification of 5.50 to 5.80 mm (0.217 – 0.228 in). We will use the tool with the rivet set and anvil, and stake the pin down until we are within 5.5 to 5.8 mm.
The staked head of the link pin should mushroom out smoothly and evenly. Examine the finished link closely. If there is any cracking in the staked area remove the link and install a new master link, o-rings and plate.
To finish up, check the chain alignment and chain slack adjustment according to the manufacturer’s recommendations.

