

When you hear the words front end alignment what comes to mind? Automobiles and potholes may be the first thought. There are other four wheeled vehicles out there running over a lot more than potholes. ATVs and side-by-sides live hard lives crawling over rocks, hauling loads, and crossing trails no other man-made vehicle would dare.
One of the most basic services these vehicles call for is the adjustment of the toe-in of the front wheels. The Suzuki Eiger LT-F-400F calls for this to be checked initially after 100 mi. or 1 month of use, and every 600 mi. or 3 months for the rest of its operational life. Be it a Yamaha Banshee, 50cc mini-quad, or Kawasaki Mule this is a periodic maintenance item that is essentially the same no matter the scale of machine.
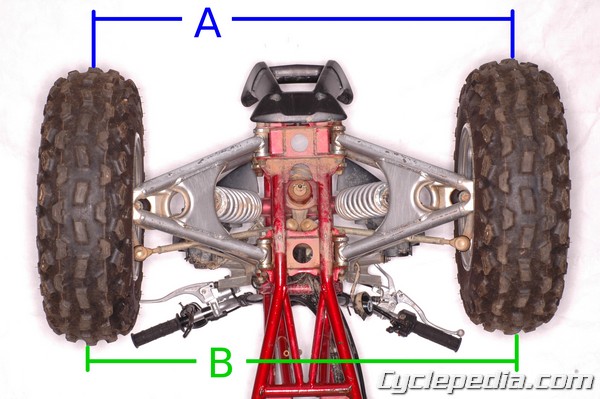
Toe-in specifically refers to the amount the front wheels are pigeon toed. At axle level the center of the front tires are closer in the front than in the back. Most ATVs and side-by-sides call for the front wheels to be slightly pigeon toed to parallel.
Keeping the toe-in aliment in specification and adjusted correctly is important for performance, safety, and tire wear. If the front end of the vehicle is in a toe-out position, duck footed, the tires will wear more rapidly and the vehicle will be inherently unstable. In addition, if the toe-in adjustment is in specification but it has been improperly adjusted it may put excess strain on the steering components.
The first step in checking the toe-in is to check the tire pressure. Make sure the tire pressure set correctly in all four tires. The air pressure in the front tires should be as close to the same as possible. Place the vehicle on a level surface and position the steering straight ahead. Be sure to check with the appropriate service manual to see if there are any extra specifics for the vehicle. The Suzuki Eiger for example calls for the vehicle to be weighted as to simulate the rider.
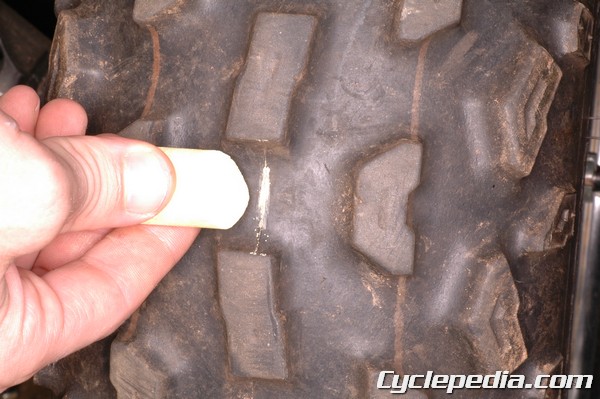
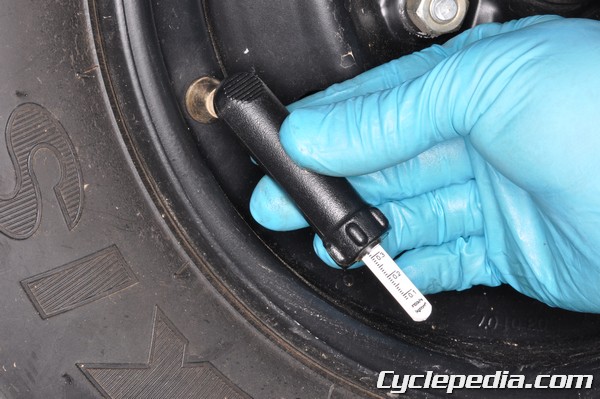
Make a chalk mark on the front, center of each front tire at the height of the front axle. If available set up a toe gauge so that the pointers line up with the chalk marks.
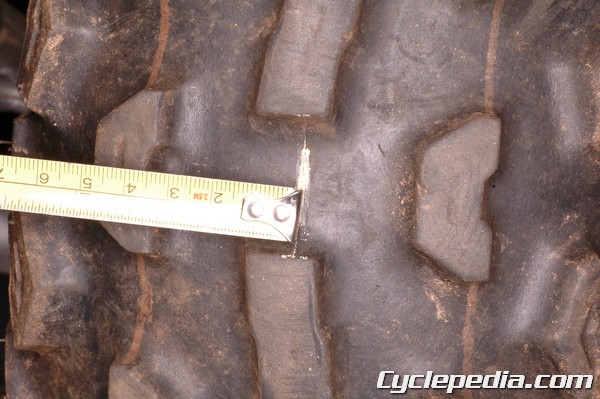
Measure the distance between the front chalk marks. Record this measurement as A. Rotate the front wheels 180° so the marks remain at axle height, but are now facing to the rear. Record the distance between the marks on the backside of the tires as B.
Subtract the front measurement A from the rear measurement B to calculate the toe-in. If the number is negative you have a toe-out condition. Compare your toe-in figure with the factory specification found in the vehicles service manual.
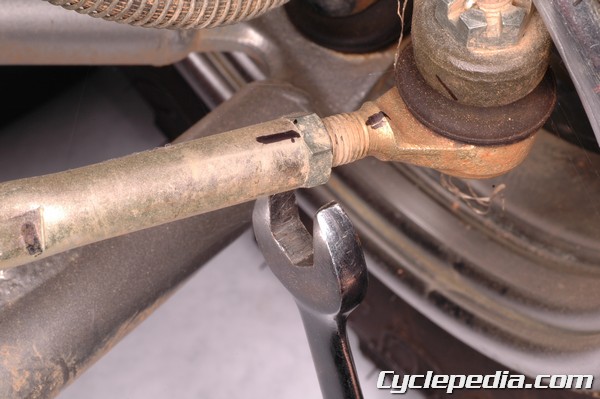
To adjust the toe-in loosen the lock nuts on the tie-rods. The outer tie-rod lock nuts often have left hand threads.
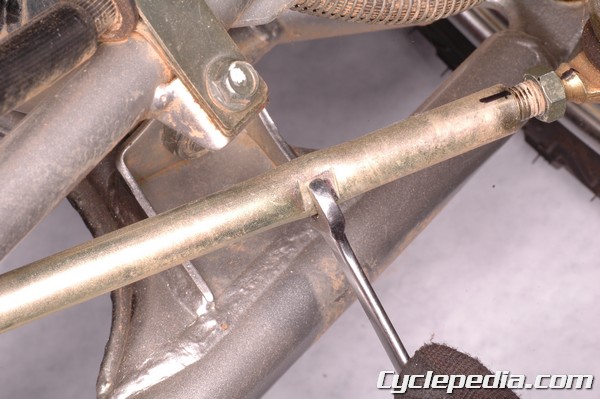
Turn the tie rods with a wrench at the flats to change the toe-in. Be sure to evenly adjust the left and right tie-rods for proper alignment. Check with the service manual to see if there are any specifications for the length of the tire rods or the amount of threads that should be showing. If the tie-rods are not adjusted according to the OEM specifications the proper toe-in may be achieved, but the vehicle will not steer correctly and it could be at risk of breaking a tie-rod.
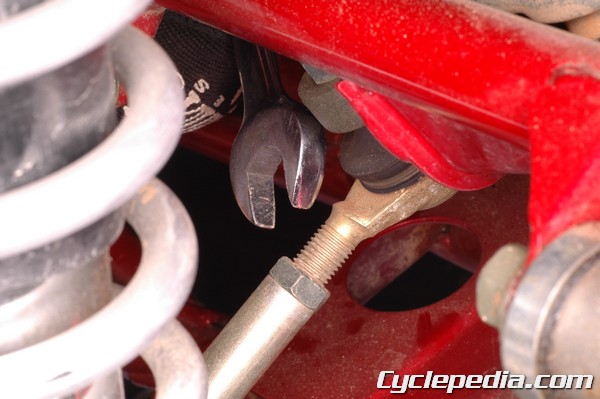
When the adjustment is correct hold the tie-rod flats and tighten the lock nuts to specification against each side of the tie-rod. Take a slow test ride to make sure the steering functions correctly.