
 Like this Manual?
SAFETY FIRST: Protective gloves and eyewear are recommended at this point.
Remove the starter motor. See the Starter Motor topic for more information.
Disassembly
2002 – 2008 Models
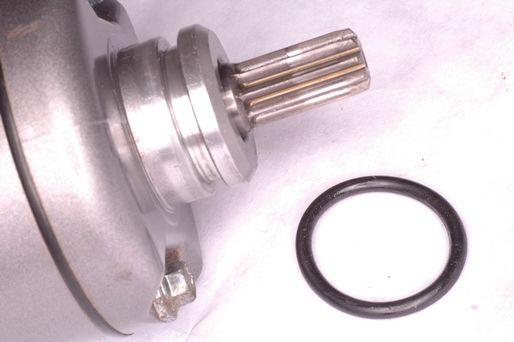
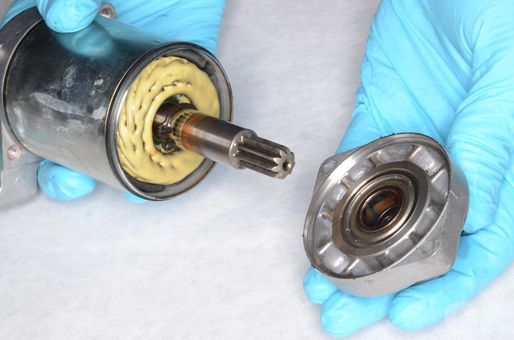
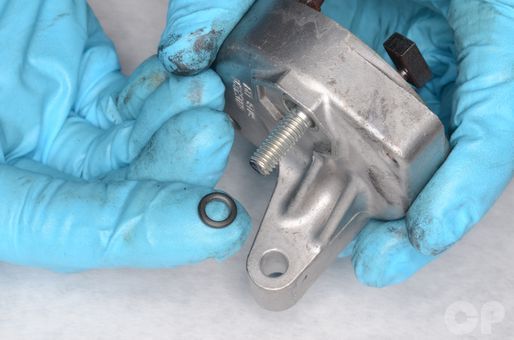
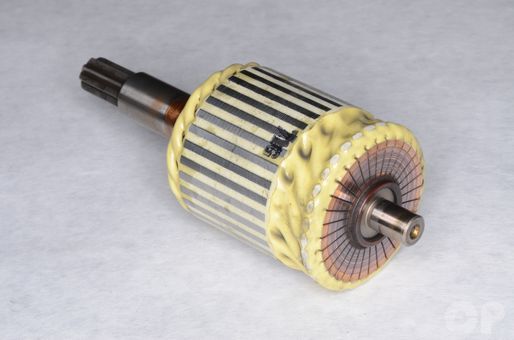
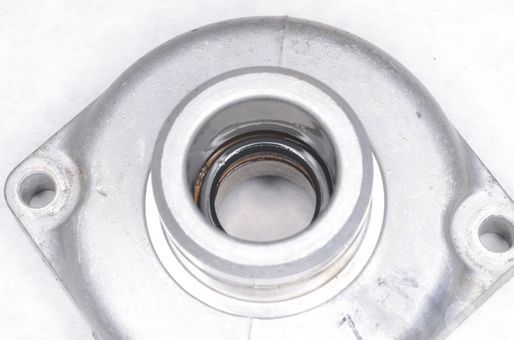
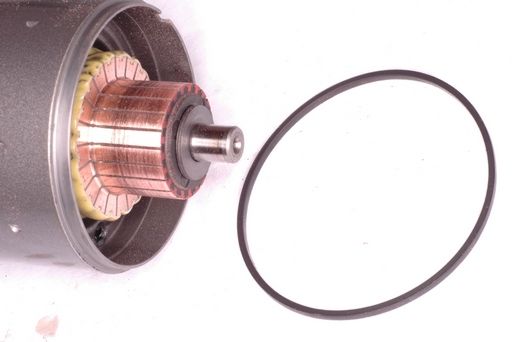
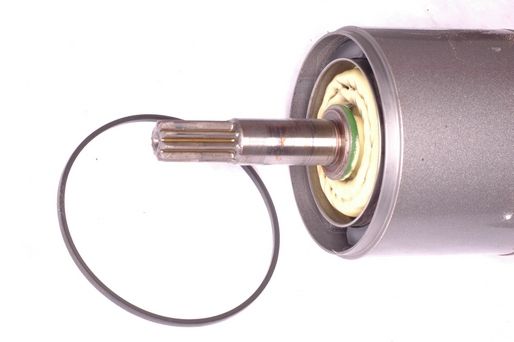
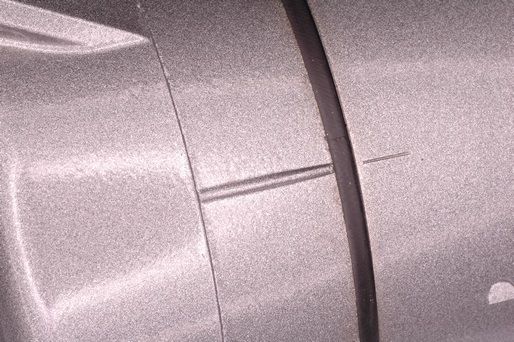
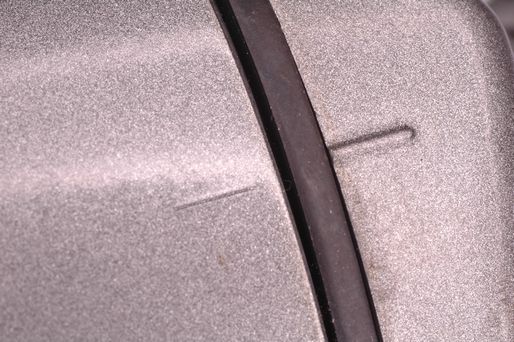
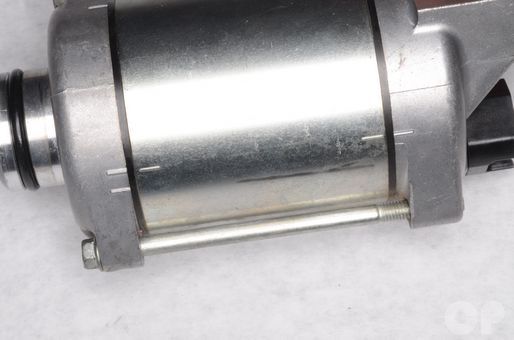
Inspect the O-ring for cuts or other damage, replace as necessary. Try to turn the starter motor armature shaft with your hand. It should turn with a small amount of resistance. If it doesn’t turn at all or is very hard to turn, the starter motor will need to be replaced or rebuilt.
Starter Rebuild
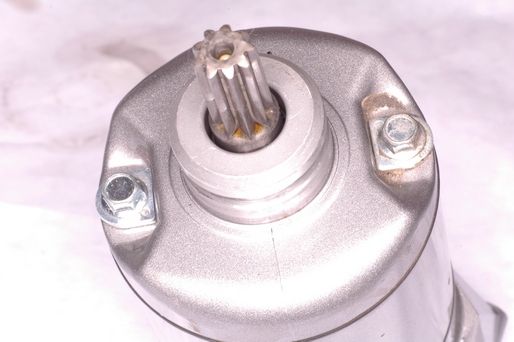

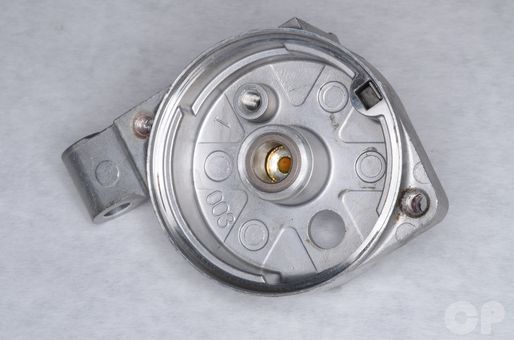
Remove the two bolts holding the starter motor together using a 7 mm wrench. Note the position of the D shaped washers and O-rings.
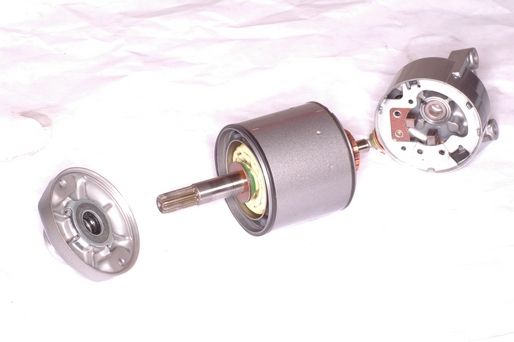
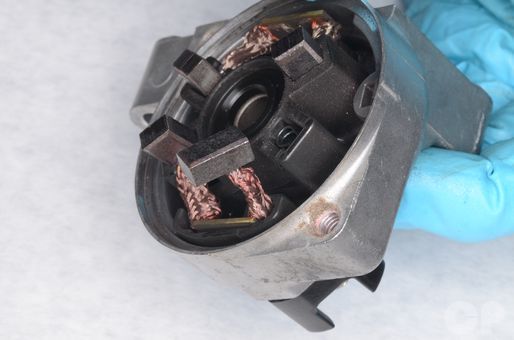
Remove the end cap and the brush plate holder.
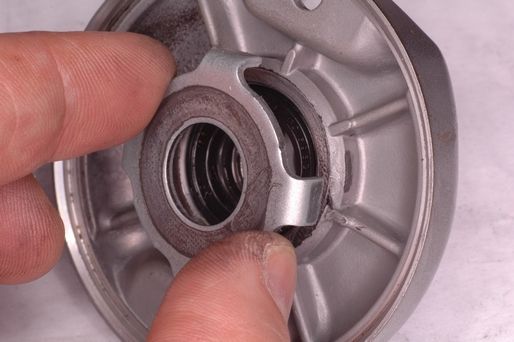
Note the location of the thrust washer and any shims on the armature.
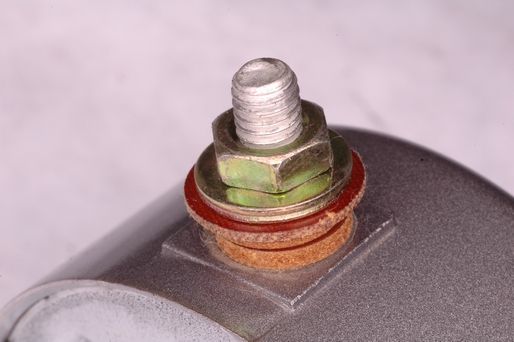
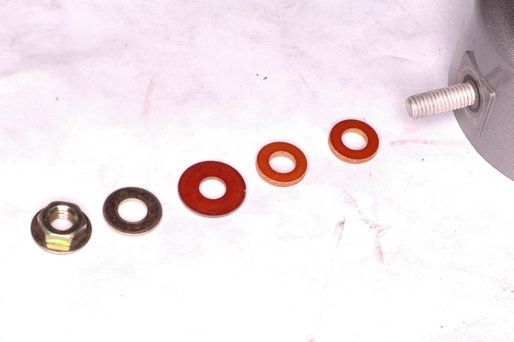
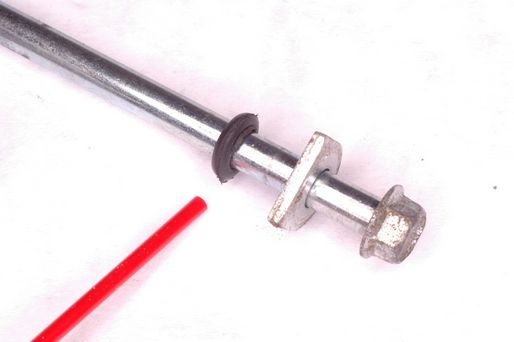
Remove the terminal stud nut using a 10 mm wrench and take off the steel and phenolic (plastic) washers, noting their position on the stud.
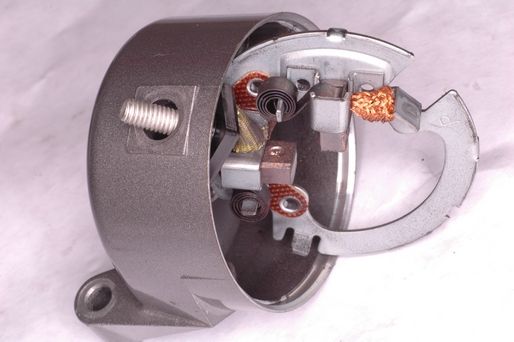
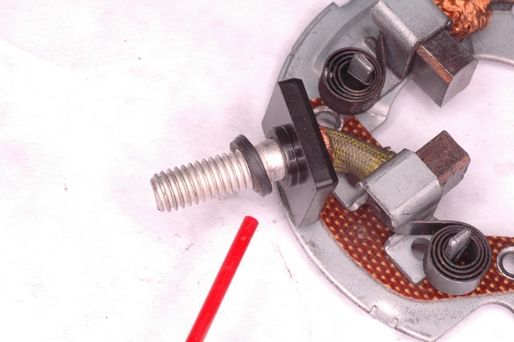
Pull out the brush plate, noting the location of the insulating rubber washer. Clean off any carbon dust with aerosol electrical contact cleaner.
2009 and Newer Models
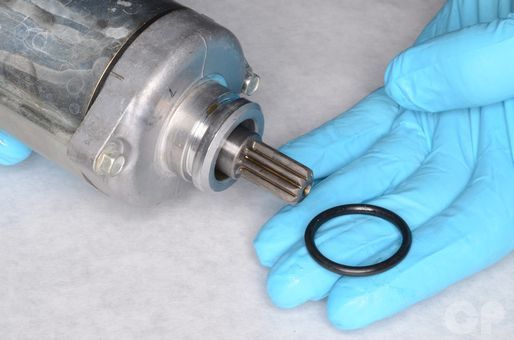
Remove the O-ring from the end of the starter motor that enters the crankcase. Discard the O-ring. Try to turn the starter motor armature shaft with your hand. It should turn with a small amount of resistance. If it doesn’t turn at all or is very hard to turn, the starter motor will need to be replaced or rebuilt.
Remove the two bolts holding the starter motor together using a 7 mm socket.
Slide off the front cover.
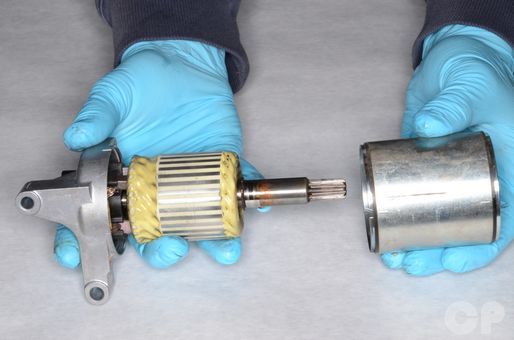
Remove the starter motor case from the armature. The starter motor case O-rings should be replaced anytime the case is removed.
Separate the armature from the rear cover.
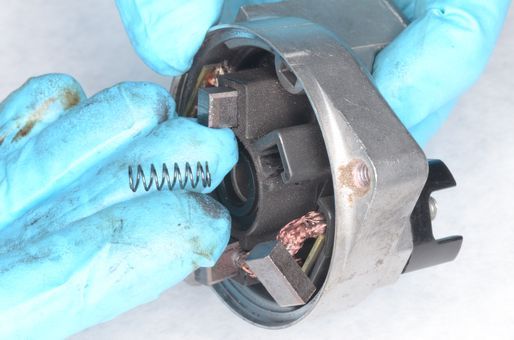
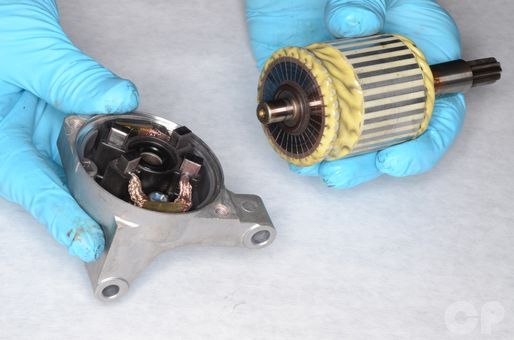
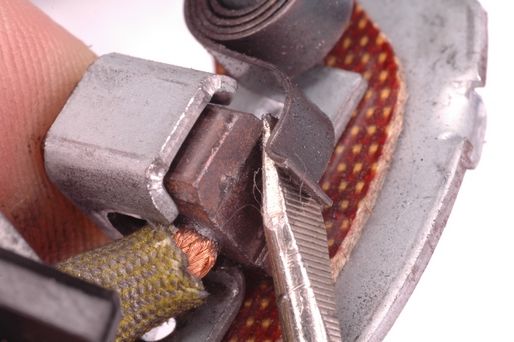
Remove the brushes and springs from the brush holders.
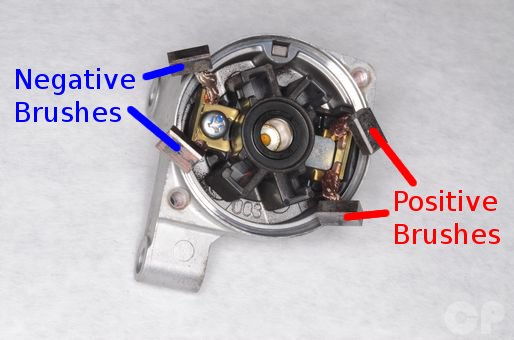
The starter motor has negative and positive brushes.
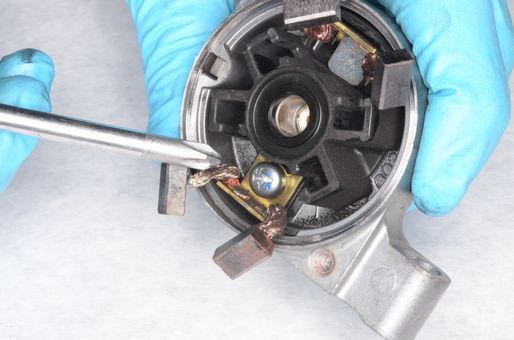
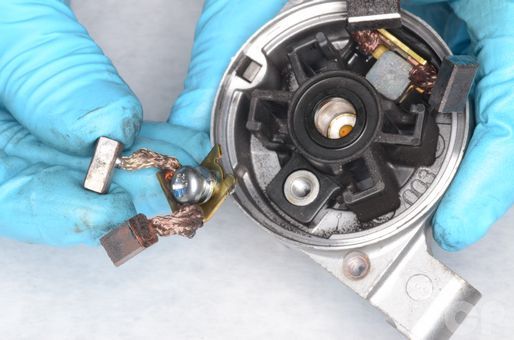
Remove the negative brush mounting screw with a Phillips screwdriver. Remove the negative brushes from the rear cover.
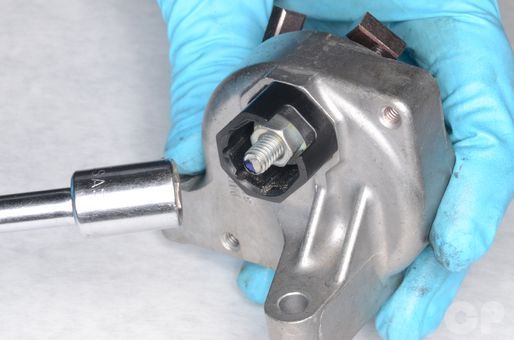
Loosen the starter motor terminal nut with a 10 mm socket.
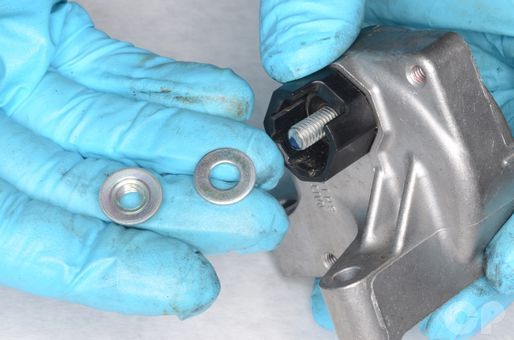
Remove the nut and washer from the starter motor terminal.
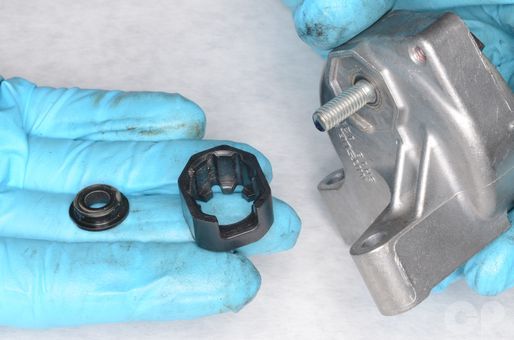
Remove the terminal stopper and insulator.
Remove the terminal O-ring.
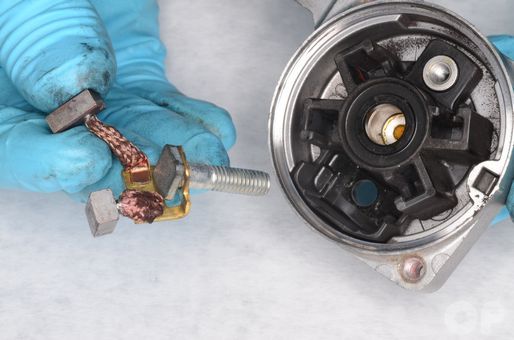
Remove the positive brushes and terminal bolt.
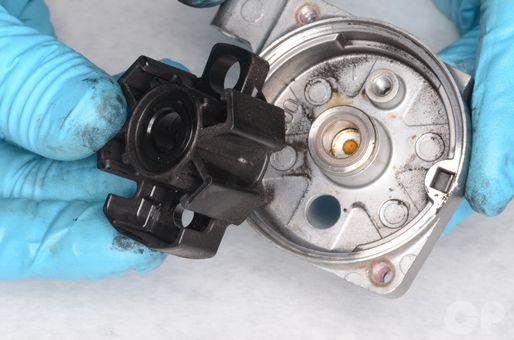
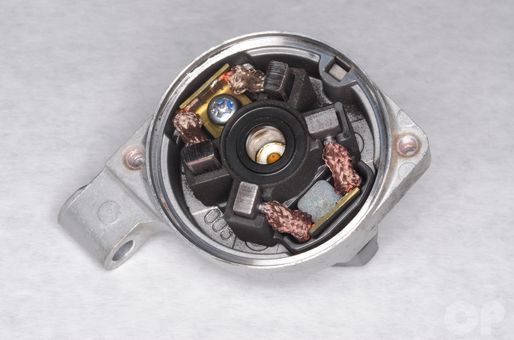
Remove the brush holder from the rear cover.
Inspection
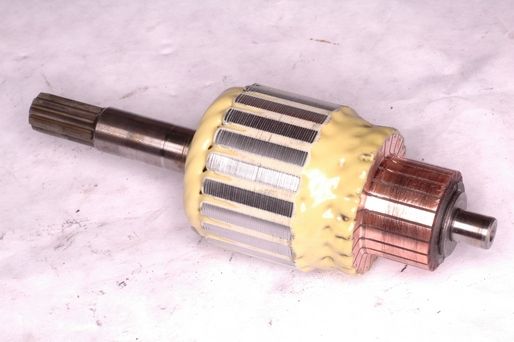
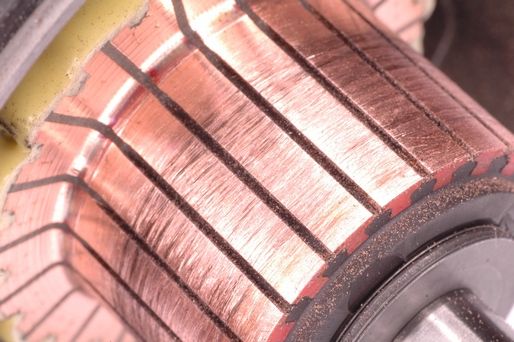
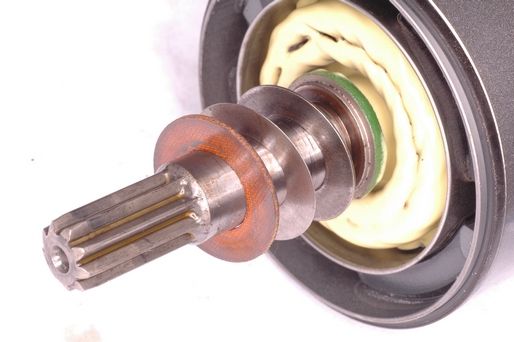
Remove the armature from the starter motor body, clean it with aerosol electrical contact cleaner and inspect the copper commutator strips for wear or oxidation. Oxidation can be removed with a pencil eraser.

If the commutator strips are only slightly worn they can be resurfaced using a very fine grit emery cloth. If they are badly worn the armature must be replaced.
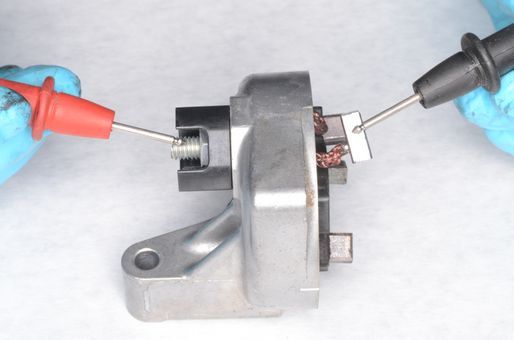
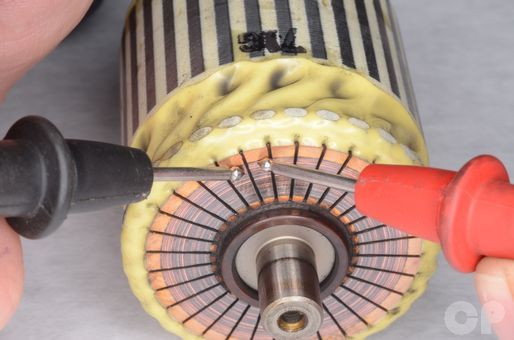
Set the multimeter to ohms of resistance (Ω). Check for continuity between the positive brushes and the starter motor terminal. There should be continuity.
Check for continuity between the positive brushes and the rear cover. Also, check for continuity between the positive brushes and the negative brushes. There should be no continuity in both cases.
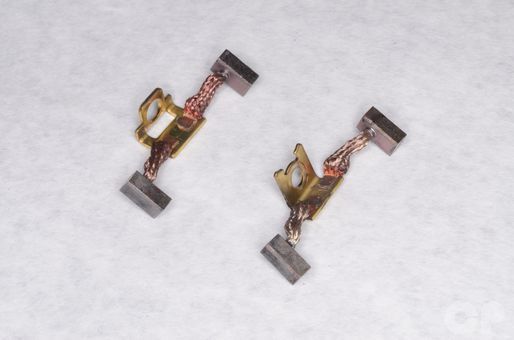
Measure the length of the brushes lengthwise. Replace the brushes if they are below the service limit. Also, measure the commutator diameter on the 2002 – 2008 models.
2002 – 2008 Models
Commutator Diameter: 28 mm (1.10 in.)
Commutator Service Limit: 27 mm (1.06 in.)
Brush Length: 12 mm (0.47 in.)
Brush Length Service Limit: 4 mm (0.16 in.)
2009 and Newer Models
Brush Length: 12 mm (0.47 in.)
Brush Length Service Limit: 6.5 mm (0.26 in.)
Inspect the armature for damage and signs of wear and discoloration.
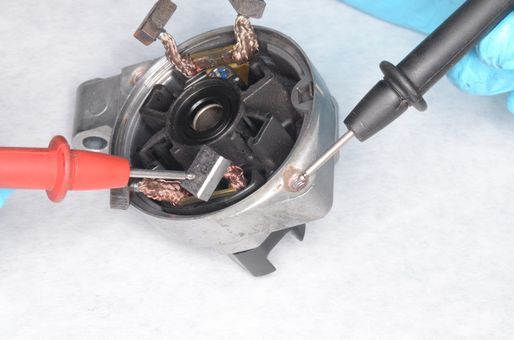
Using a digital multimeter set to ohms of resistance (Ω), touch one meter lead to any one commutator strip and touch the other meter lead to all of the other commutator strips one by one. Polarity of the meter leads does not matter. There should be continuity for all of the readings, if any readings shows no continuity the armature must be replaced.
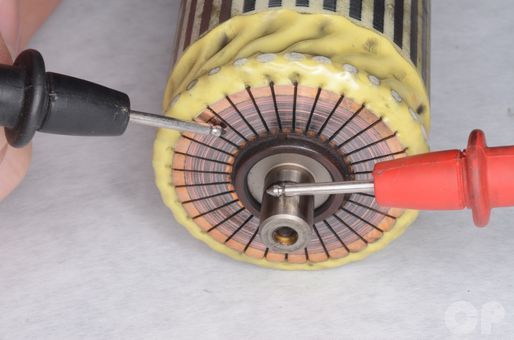
Using a digital multimeter set to Ohms of resistance, touch one meter lead to any one commutator strip and touch the other meter lead to the steel shaft of the armature. Polarity of the meter leads doesn’t matter, and you only need to check one of the commutator strips. There should be no continuity, if there is the armature must be replaced.
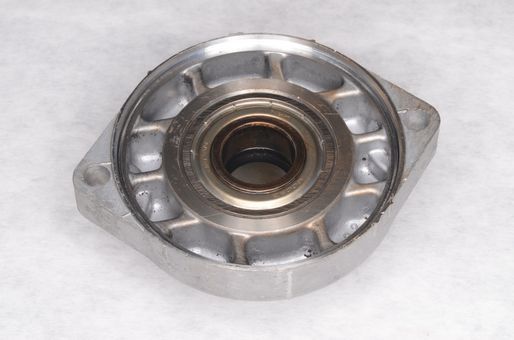
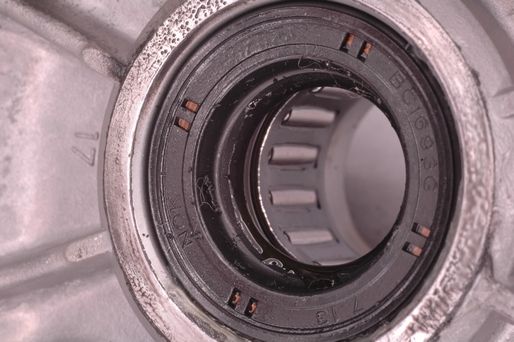
Inspect the starter motor bearing and seal. Replace the parts as needed.
Inspect the starter motor bushing for wear and damage and replace it as needed.
Assembly
2002 – 2008 Models
Inspect the oil seal lip for wear or damage. Replace as needed. Lubricate the oil seal with grease.
Retract the brushes against their springs and install the brush plate holder.
Install the washers and terminal stud locknut using a 10 mm wrench.
Starter Motor Terminal Locknut [2002 – 2008]: 6.9 N-m, 0.7 kgf-m, 61 in-lb
To reassemble the starter motor, install the armature in the starter motor body with the commutator strips in the end of the body with the notch cut out of it in the left photo. Make sure both O-rings are in good condition and in position around the ends of the starter motor body.
Install the thrust washer and any shims on the armature.
Align the marks in the starter motor body and the brush plate holder. Note the position of the O-ring.
Install the starter motor end cap, making sure to align the marks in the starter motor body and the end cap. Note the position of the O-ring.
Make sure to position the D shaped washers and O-rings properly. Tighten the bolts securely. After assembly, turn the armature shaft with your hand, it should turn with a little resistance. If it doesn’t turn at all or is difficult to turn, take the starter motor apart and go through the assembly procedure again, checking to make sure the brush plate and shims are in their proper positions.
Starter Motor Bolts
2002 – 2003: 3.9 N-m, 0.4 kgf-m, 35 in-lb
2005 – 2008, 700cc: 4.9 N-m, 0.5 kgf-m, 43 in-lb
Make sure the O-ring is in good condition. Apply a light coat of grease to the O-ring and install.
2009 and Newer Models
Set the brush holder into the rear cover.
Install the positive brushes and terminal bolt.
Install a new terminal O-ring. Coat the O-ring in fresh engine oil. Install the terminal stopper and insulator.
Install the terminal washer and nut. Tighten the nut to specification with a 10 mm socket.
Starter Motor Terminal Locknut
2002 – 2008: 6.9 N-m, 0.7 kgf-m, 61 in-lb
2009 and Newer: 11 N-m, 1.1 kgf-m, 97 in-lb
Install the negative brushes to the rear cover. Tighten the negative brush mounting screw securely with a Phillips screwdriver.
Set the armature into the bushing in the rear cover.
Install new O-rings onto the starter motor case. Install the starter motor case and front cover.
Line up the starter motor case with the end covers.
Install the two new long starter motor bolts. Tighten the bolts securely with a 7 mm socket. After assembly, turn the armature shaft by hand; it should turn with a little resistance. If it doesn’t turn at all or is difficult to turn, take the starter motor apart and go through the assembly procedures again.
Starter Motor Bolts [2009 and Newer]: 5.0 N-m, 0.5 kgf-m, 44 in-lb
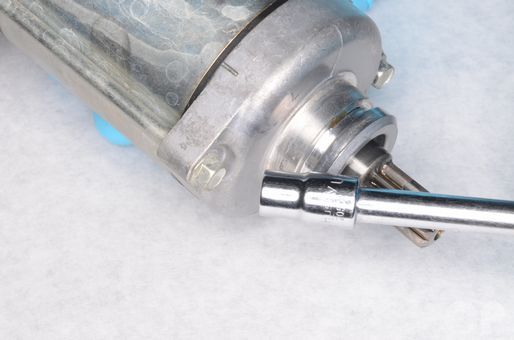
Coat the new starter motor O-ring in fresh oil and install it onto the end of the starter motor.
Install the starter motor. See the Starter Motor topic for more information.