
 Like this Manual?
SAFETY FIRST: Protective gloves and eyewear are recommended at this point.
Front Master Cylinder

Turn the handlebars until the top of the front master cylinder reservoir is level with the ground. Check the level of brake fluid. See the Brake Fluid topic for more information.
Front Brake Discs
Remove the front wheels. See the Wheels and Hubs topic for more information.
Check the front brake discs for damage or excessive wear.
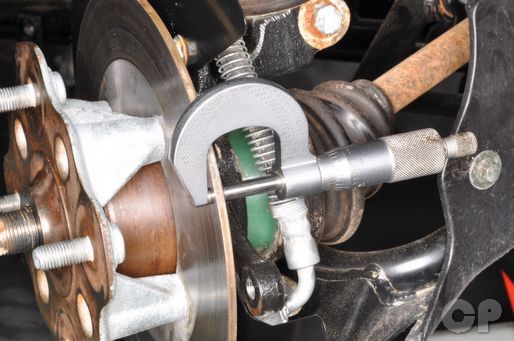
Measure the brake disc thickness with a micrometer. Replace both discs as a set if any are below the service limit.
| Item | Standard | Service Limit |
| Disc thickness | 3.3 ~ 3.7 mm (0.130 ~ 0.146 in.) | 3 mm (0.12 in.) |
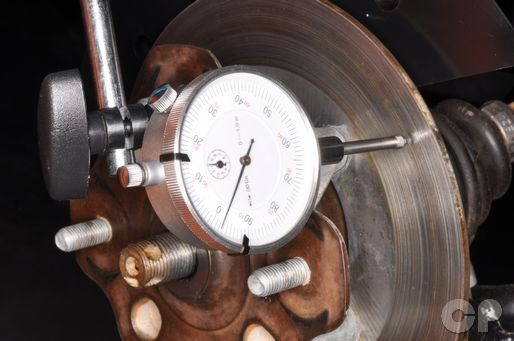
Using a dial gauge and stand measure the disc brake runout. Replace both discs as a set if any are below the service limit.
| Item | Standard | Service Limit |
| Disc thickness | 3.3 ~ 3.7 mm (0.130 ~ 0.146 in.) | 3 mm (0.12 in.) |
See the Wheels and Hubs topic to replace the front brake discs.
Front Brake Pads
Remove the front brake calipers from the knuckles. See the Front Caliper topic for more information.
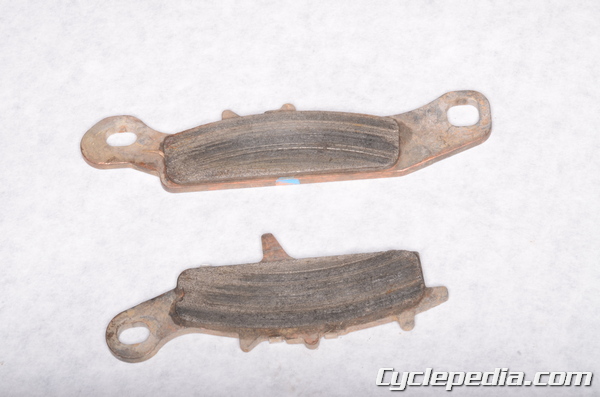
Remove the brake pads and inspect the thickness and condition of the lining. Replace the pads as a set if needed.
| Item | Standard | Service Limit |
| Pad lining thickness | 4.0 mm (0.16 in.) | 1 mm (0.04 in.) |
Rear Brake Clutch Discs
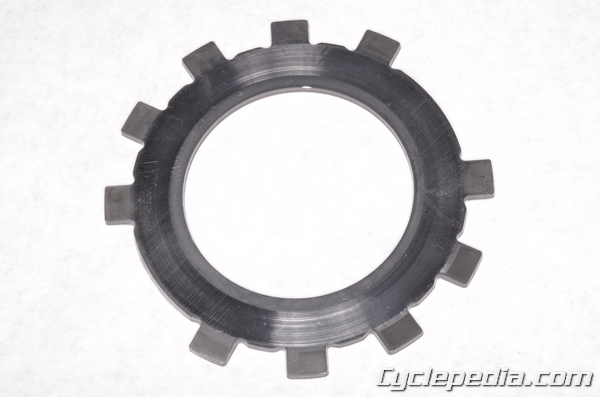
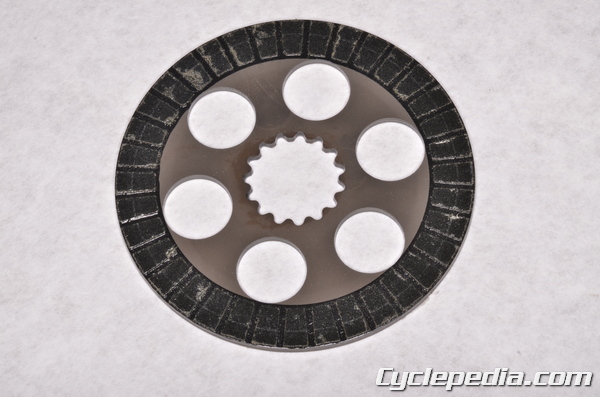
Replace the rear brake clutch discs if they show signs of damage and wear, or every 10000 km (6000 mi.) as indicated by the periodic maintenance chart. See the Internal Wet Brake topic for more information.
Rear Brake Lever Free Play
Check the operation of the rear brake lever. If the lever doesn’t operate smoothly inspect the cable. Lubricate the cable as needed.
Slide back the rubber cover from the rear brake lever.
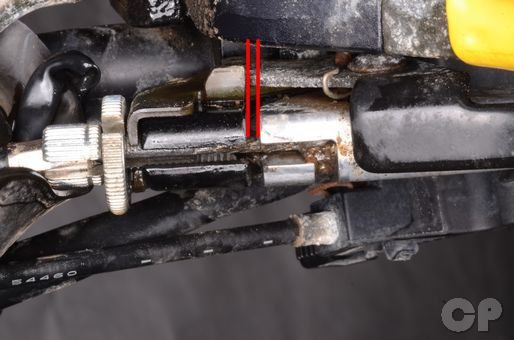
Pull in the brake lever slightly until the rear brake is engages. Measure the distance between the lever and the perch as show at the point the rear brake engages.
| Rear brake lever free play | 1 – 2 mm (0.04 – 0.08 in.) |
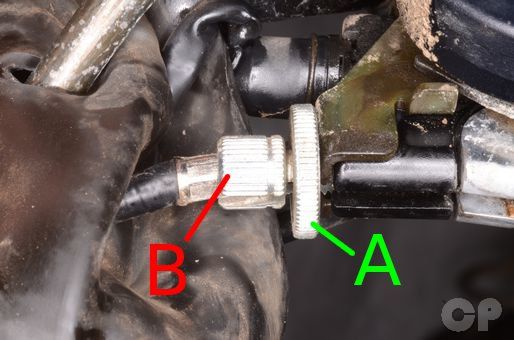
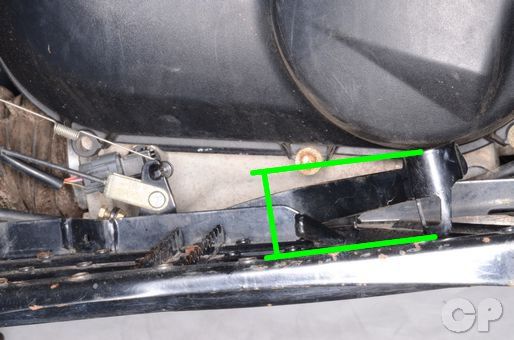
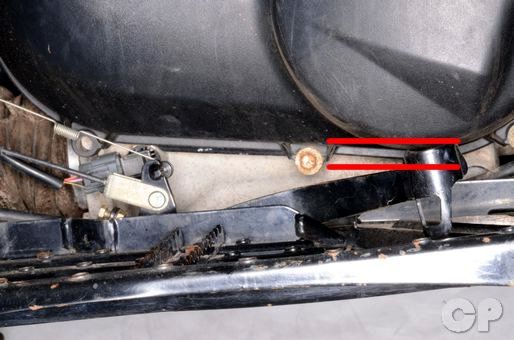
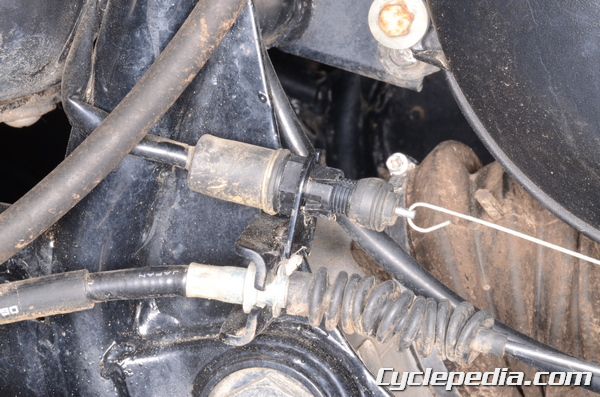
Loosen the knurled locknut (A). Turn the cable adjuster (B) all the way in. Tighten the locknut.
Adjust the brake lever cable free play with the adjuster on the brake side of the cable. The top adjuster should be the lever cable adjuster.
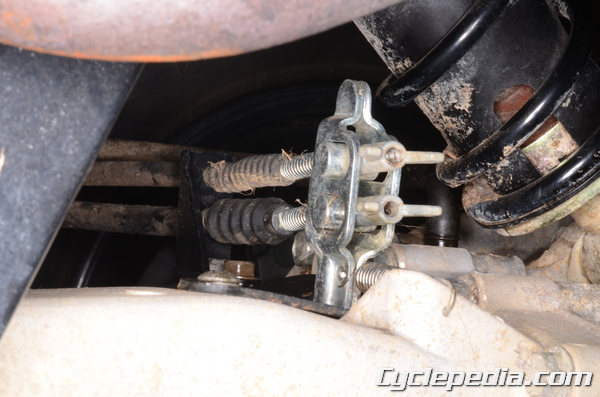
Rear Brake Pedal Position
Measure the height of the center of the rear brake pedal above the floorboard.
| Item | Standard |
| Rear brake pedal position above footboard |
55 – 60 mm (2.2 – 2.4 in.) [2002 – 2003] 60 – 65 mm (2.4 – 2.56 in.) [2004 – 2011] |

Loosen the locknut and turn the adjuster as needed to set the brake pedal height correctly. Check the brake pedal free play and rear brake light switch below.
Rear Brake Pedal Free play
Apply the rear brake pedal slightly until the rear brake is engages. Measure the distance between the pedal at rest and the pedal at the point the rear brake engages.
| Rear brake pedal free play | 15 – 25 mm (0.6 – 1.0 in.) |
Adjust the brake pedal cable free play with the adjuster on the brake side of the cable. The bottom adjuster should be the pedal cable adjuster.
Apply the rear brake pedal several times and make sure it functions smoothly and correctly.
Rear Brake Light Switch
The rear brake light switch should activate the rear brake light after 10 mm or 0.4 in. of pedal travel.
To adjust the rear brake light switch remove the rear fender. See the Rear Fender topic for more information.
Adjust the rear brake light switch by changing the position of the nut. Do not turn the switch body.