
 Like this Manual?
SAFETY FIRST: Protective gloves and eyewear are recommended at this point.
Removal
Remove the handlebar cover. See the Handlebar Cover topic.
Remove the display. See the Display topic.
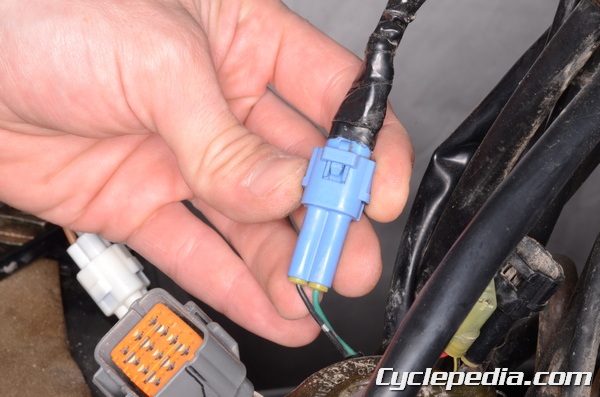
To disconnect the handlebar switch connectors remove the front fender. See the Front Fender topic.
Front Brake Master Cylinder
Remove the front brake master cylinder. See the Master Cylinder topic.
Throttle

The throttle housing is part of the right switchgear.

Remove the three throttle housing screws with a #2 Phillips screwdriver.

Separate the throttle housing and free it from the handlebar.

The 2WD/4WD switch can be removed if needed with a small Phillips screwdriver.

Unplug the 2WD/4WD switch as needed.

Remove the bar guide.

To remove the throttle arm take out the screw with a #2 Phillips screwdriver.
Left Hand Switch Assembly

Remove the two left switchgear housing screws with a #2 Phillips screwdriver.

Separate the switch housing from the handlebar. Note the hole in the handlebar and the post on the switch housing. Do not open the housing more than 40°.

Unplug the left handlebar switch connectors if needed.
Rear Brake and Differential Control Lever Perch

Remove the rear brake and differential control lever perch screws with a #3 Phillips screwdriver.

Separate the perch and free if from the handlebar.

Remove the wire band and free the differential control lever. Unplug the two rear brake lever light switch bullet connectors as needed.
Handlebar

There are four handlebar holder bolts. The front bolts also secure a cable, hose, and wire guide.

Remove the four handlebar holder bolts with a 12 mm socket.

Remove the handlebar holders and the handlebar.
Grips

If you plan to replace the grips you can slice them lengthwise with a razor blade and peel them off. To remove the grips without cutting them use a screwdriver to open a gap between the grip and the handlebar. Spray in contact cleaner to break up the grip cement. Use compressed air to expand the grip so it can be easily slid off the end of the handlebar. Note the relationship between the angle of the grip and the bar so that the new grip can be installed with the correct angle.
NOTE: Always wear safety glasses when using compressed air and never point it directly at yourself or anyone else.
Before installing the grips to the handlebar, wipe down the area with a brake or parts cleaner that will dry without leaving a residue. When you are sure the area is dry apply grip cement to the bar or tube. Install the grips at an angle of your preference.
Wire, Hose, and Cable Routing

Route the components correctly.

Installation
Handlebar
Place the handlebar onto the steering shaft.

The punch mark must line up on the outside of the holders.
Install the handlebar holders and guide. Tighten the front holder clamp bolts before the rear. Torque them to specification with a 12 mm socket.
Handlebar Holder Bolts: 29 N-m, 3.0 kgf-m, 22 ft-lb
Throttle
Fit the bar guide into the upper throttle housing.
Install the throttle hosing onto the handlebar.

The post in the throttle housing must fit into the hole in the handlebar.
Install the three throttle lever case screws and tighten securely with a #2 Phillips screwdriver.
Plug in the 2WD/4WD switch connector.
Front Brake Master Cylinder
Install the front brake master cylinder perch 70 mm (2.76 in.) to the inside of the right grip. See the Master Cylinder topic.
Left Hand Switch Assembly
Do not open the left switchgear housing more than 40°. Join the switch housing halves onto the handlebar.
Install the two screws into the left hand switch assembly and tighten securely with a #2 Phillips screwdriver.

Plug in the left handlebar switch connectors.
Rear Brake and Differential Control Lever Perch
Fit the rear brake and differential control lever perch into place so that the punch mark on the bar sits to the right of the perch and lines up with the clamp mating surface. There should be 6 mm (0.24 in.) Between the rear brake and differential control lever perch and the left switchgear housing.
Tighten the rear brake and differential control lever perch screws securely with a #3 Phillips screwdriver. Plug in the rear brake light switch bullet connectors if they were unplugged.
Install the front fender. See the Front Fender topic.
Install the display. See the Display topic.
Adjust the differential control lever cable. See the Differential Control topic.
Install the handlebar cover. See the Handlebar Cover topic.
Adjust the rear brake lever and pedal. See the Brake Inspection topic for more information.
Inspect the throttle free play and operation. See the Throttle Free Play topic for more information.