
 Like this Manual?
SAFETY FIRST: Protective gloves and eyewear are recommended at this point.
Removal
Drain the differential oil. See the Final Gear Case Oil topic for more information.
Remove the left suspension arm. See the A-arms topic for more information.
Unplug the 2WD / 4WD actuator. See the Actuators topic for more information.
Remove the front axles. See the Front Axles topic for more information.
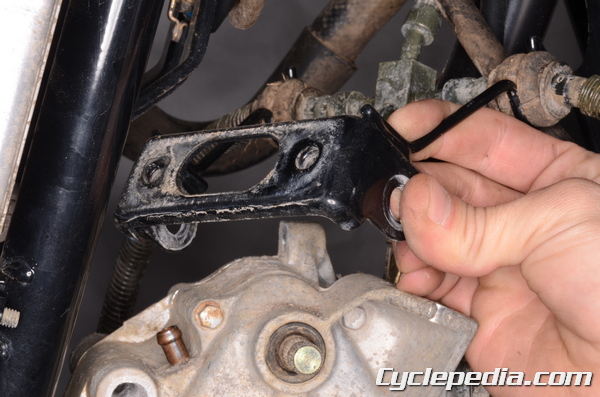
Remove the steering stem bearing housing from the differential. See the Steering Stem topic for more information.
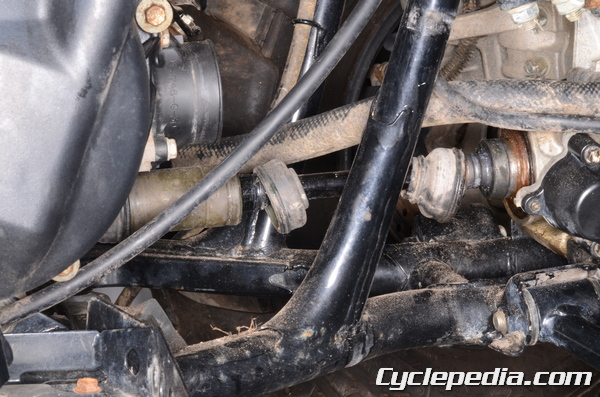
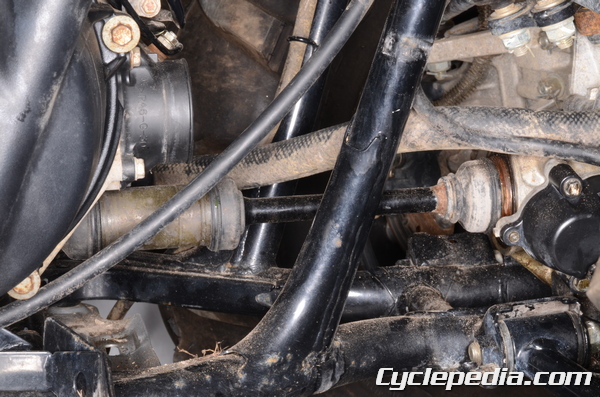
Slide back the O-ring clamps from the rubber covers of the front propeller shaft. Slide back the rubber front propeller shaft covers.
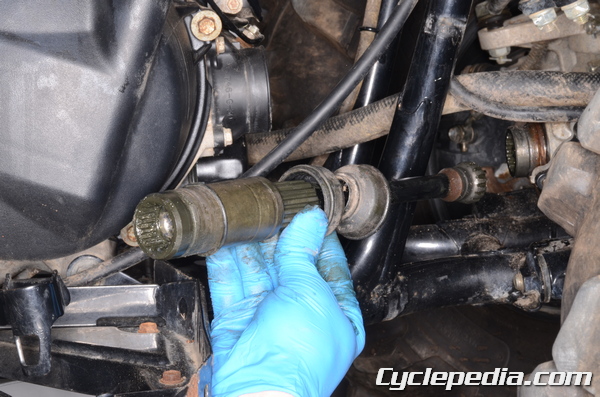
Move the front propeller shaft back towards the engine and free the front end of the shaft from the front differential. Move the shaft forward and free the rear of the shaft from the engine. Remove the front propeller shaft.
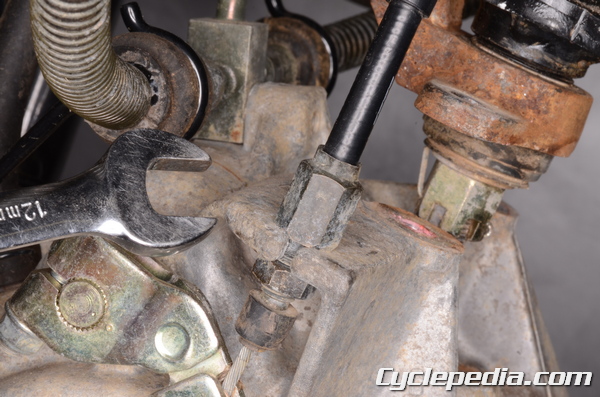
Loosen the front differential control lever cable locknut with a 12 mm wrench.
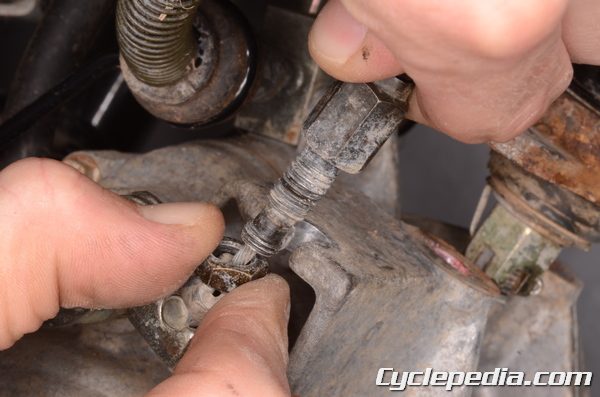
Free the differential control cable from the stay on the differential.

Disconnect the cable end from the lever.
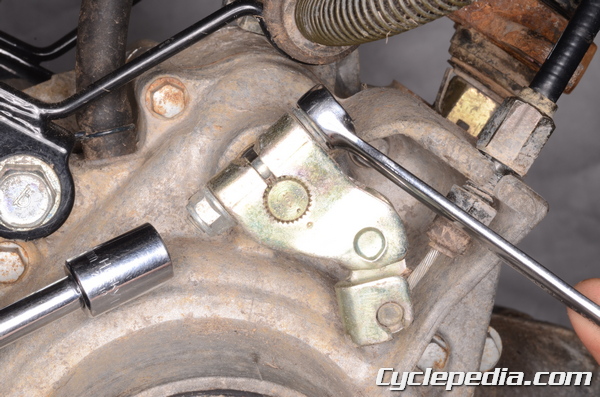
To remove the differential control shift shaft lever loosen the nut and bolt with a 10 mm wrench and socket.

Remove the nut, bolt, and differential control shift shaft lever.
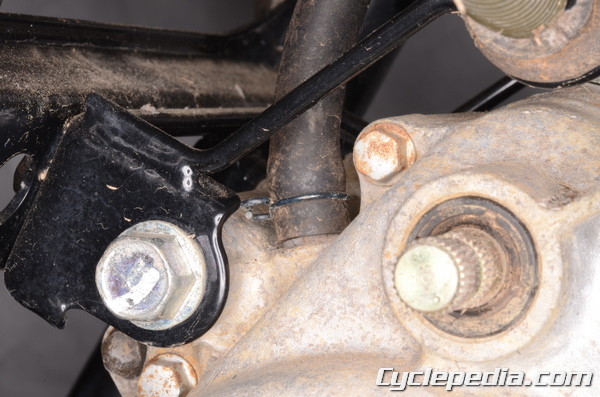
Slide back the clamp and free the vent hose from the front differential.
Remove the front brake line mounting bolt with an 8 mm socket.
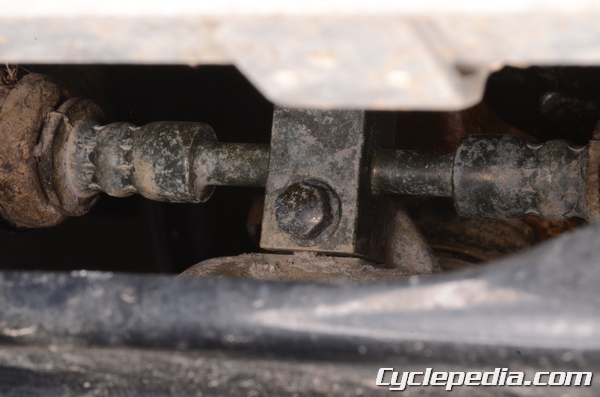
Hold the front differential mounting bolts with a 14 mm socket and loosen the nuts with a 17 mm socket. Remove the three sets of nuts and bolts.
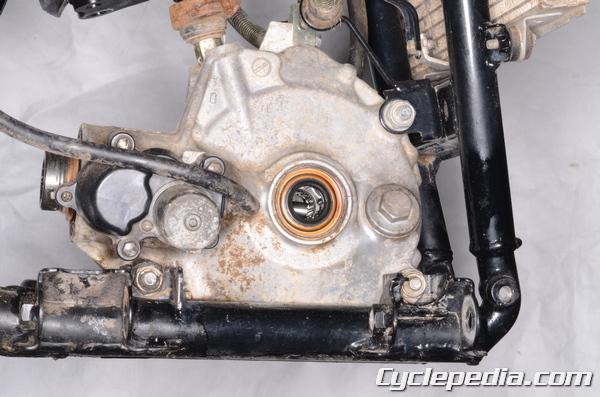
Remove the front differential upper mounting bracket.
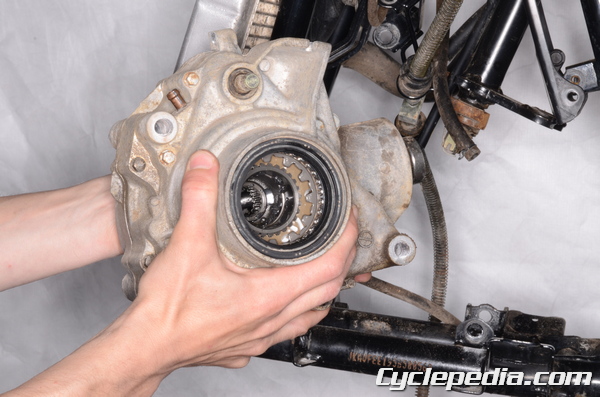
Remove the front differential from the left side of the frame.

To remove the 2WD / 4WD actuator. See the Actuators topic.
To disassemble the front differential see the Differential Disassembly topic for more information.
Installation
Install the front differential onto the vehicle.
Fit the front differential upper mounting bracket into place.
Insert the front differential mounting bolts from the left side. Thread on the nuts. Hold the mounting bolts with a 14 mm socket and torque the nuts to specification with a 17 mm socket.
Front Final Gear Case Bolts / Nuts: 59 N-m, 6.0 kgf-m, 43 ft-lb
Install the front brake hose bolt and tighten it securely with an 8 mm socket.
Connect the vent hose to the front differential. Secure the hose with the clamp.
Install the differential control shift shaft lever to its shaft so that the punch marks line up. Tighten the differential control shift shaft lever the nut and bolt to specification with a 10 mm wrench and socket.
Shift Shaft Lever Bolt: 8.8 N-m, 0.9 kgf-m, 78 in-lb
Connect the differential control cable to the lever and fit it into the stay on the differential.
Adjust the front differential control lever cable and tighten the locknut with a 12 mm wrench. See the Differential Control topic for more information.
Clean off the old grease from the front propeller shaft splines. Inspect the splines for wear and damage and replace the parts as needed. Lubricate the splines with fresh molybdenum disulfide grease.
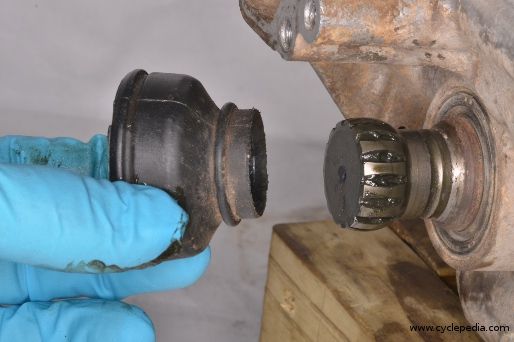
Place the rubber boot on the front of the output driven bevel gear shaft if it was removed. When installing the rubber boots- the O-ring clamps must land in the grooves on the shaft to be secure.
Install the propeller shaft to the engine and pull it back. Fit the front of the shaft into the front differential.
Slide the rubber covers into place. Secure the rubber covers with the O-ring clamps.
Connect the steering stem bearing housing to the differential. See the Steering Stem topic for more information.
Install the axles. See the Front Axles topic for more information.
Plug in the 2WD / 4WD actuator. See the Actuators topic for more information.
Install the left suspension arm. See the A-arms topic for more information.
Install the front wheels. See the Wheels and Hubs topic for more information.
Fill the differential oil. See the Final Gear Case Oil topic for more information.